Playing around with my F48 tris for a while I get the urge to have something smaller and more easy to transport.
I got some ideas from my friends and decided to start a build.
From now on I will document my building progress here for my fellow multihullers, if the finished tri sails well I will do proper drawings for fellow builders to build their own RT65. For now I will upload the first sketches I have drawn.
I will build the trimaran hulls from styrofoam cut by hot wire alike ‘Ghosttrain Texas style’. Yesterday evening I started the templates for the floats and cut from hard board .
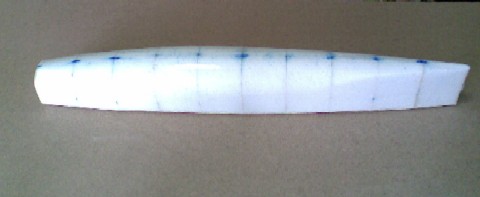
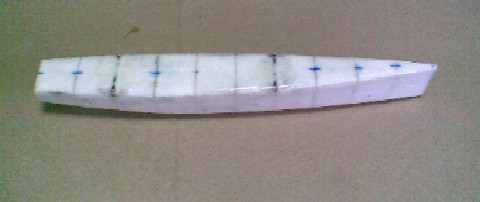
Last night I cut the foam sections for the main hull from a block of 65mm styrofoam. The foam block is first cut to pieces little bit larger than the templates. The pieces are thewn marked with centerline and CWL marks. The hard board templates are aligned to the markings and attached to these styrofoam chunks blocks with double sided tape - the one that glues the sails as well. Then the sections are cut out with the hot wire.
Be careful when cutting the bow section - because of the large difference in size you have to move the wire at the larger section faster than at the small one.
Hi, Dick,
it’s a shot of one of the Carbon tubes covered with glas/epoxi on the top. In the foreground you see the cross section where the tube is open. In the background there is the second floater.
It is a detailed view on the right(?) “beam supporter” from the picture below.
Hi, Siri,
how did you manage that the tubes are properly adjusted? You have to align two times three tubes - three in a line and both sets parallel. Additionally, the hole stuff must be perpendicular to the centerline and parallel to the waterline …
A difficult task without some special tools, isn´t it?
I am just drawing a tri by my own and will start building in winter
Hi Joachim,
I did align the floats parallel on a board, aligned the pairs of tubes connected with a beam on this board in 90 degree angle to the floats centerline and glued them in. Then I proceeded to align the floats (after the tube inserts are cured) with the main hull and glued the prepared mainhull tubes in too. The mainhull tubes have an angle of about 2 degrees up per side to have the float decks 20mm higher than the main hull deck. I had prepared these two tubes before gluing them to the main hull.
I hope his explanation helped you , if you have further questions feel free to ask me.
I am still looking for a lightweight clamp mechanism. I do not dare to go with a screw through the Carbon tubes. It would be the simplest way, but extruded tubes split very easily in a longitudinal direction, wrapped tubes are very bendy …
What do you think about an aluminum tube as support tube and an aluminum tube as an insert in the beam. This should avoid splitting …
On the other hand, this does not allow any realignment afterwards …
I might argue for attaching the tubes to the top of all three hulls. That way, you can easily make them removable, adjustable, whatever. I was planning on doing something similar for my rg65m. I must say, you and Dick have a good jumpstart of me. I’ve got a star 45 I’m planking to make a mould from, have to get that done so I can start on my rg65m.
Looking good, keep up on it.