I did plan to make the x-beams removable at the beginning but then opted for the solution I build now because the removeable version adds considerable weight to the boat (larger reinforcement, heavier tube connectors, bolts etc). Second reason I did it the way I have done was that the boat is not overly big so it is not so important for me to make it downbreakable.
Anyway the x-beams can be done any way as long as they keep the floats and the mainhull in the positions intended. I wish you luck for your 65cm multihull.

Last night I have been working on the foils. I had 2 pieces of 2mm balsa wood sandwiched with a carbon cloth core the day before.
Usinfg this balsa sandwich board I cut the foils (keel & rudder) and sanded them to an airfoil shape.


After shaping the foils I have cut them to lenght and glued the rudder shaft to the rudder and a bolt to lock the keel to the main hull into the keel part.
When the glue has dried I waterproofed the foils painting them with epoxy.
Today I will build the keelbox and attach it to the main hull.
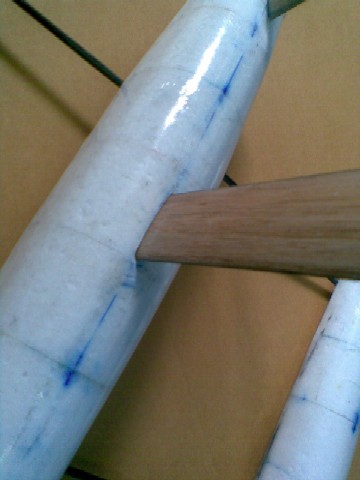
Dear Joachim, if you are going to clamp the tubes in place with a screw then I think an aluminium tube glued at the outside of the extruded carbon beams at the joints would do the job, keeping the carbon tubes from splitting. These extruded tubes are very strong but split very easy even when cutting them to lenght.
Yes, I know …
I use such tubes for masts for my RG65s.
After several trials, I now insert Aluminum tubes into the Carbon tube whereever I have to drill a hole. Fixing the Aluminum tube with Epoxi adhesive prevents the Carbon tube from splitting (bring it in through the drilled hole with a pin and use some heat to make it less viscous).
Inserting the Aluminum tubes is a bit more effort than using a “sleeve” but it looks better and is sufficient for fixing the jib stay or the cantilever for the back stay.
For cutting, wrap adhesive tape around the tube and use a small cutting disk with the Dremel. Working slowly around the perimeter you can prevent the tube from splitting very easily. Finally , seal the cutted edges with instant glue
Yes it is much more work to glue the aluminium tubes to the inside, on mast and booms where you can see it looks better when they are inside - . In the case of the tri I think it does not matter, you will not see the aluminium tubes when the boat is assembled.
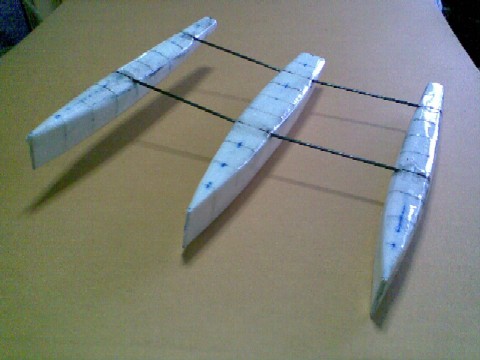
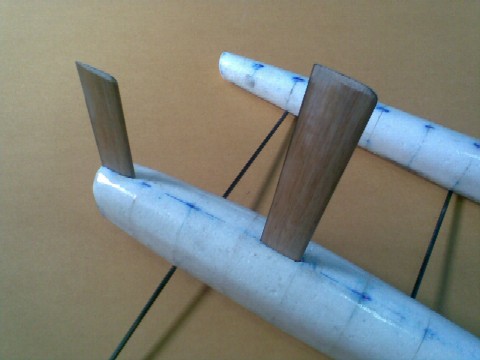
Meanwhile I have cut the 6mm carbon tubes for thew beams to lenght and test fit to the floats and the main hull.

Working on the keelbox now. I wrapped the keel foil with several layers of cling film, waxed it, laid two layers of 200g/sqm glass cloth wetted with epoxy on a flat surface around the fin and covered it with peel ply.
I have fixed the layup with some small clamps and put aside.
Tomorrow morning when the resin is dried I will glue the keel box in place.
Boy, If Dick and I don’t get going here soon, your gonna be getting the RG65m number 1 sail numbers! I can’t wait to see it going. I just finished reducing the ghost train plans for my first one, was gonna design it myself, but figured I had better start with something that already works, this is my first multi. It is looking good, but I wonder if the carbon is gonna be stiff enough to do the job? It looks like alot of bending force is applied to these joiners, especially when sailing on one hull.
I hope the carbon beams are strong enough, those are very stiff and the boat now weights only 400g. With appendages rc and rig installed total projected weight is less than 750g.
I will use a swing rig from one of my RG65s for the first tests.
I have cut the hole for the centerboard and the rudder shaft and glued the keelbox and the rudder tube into place. Then I test fitted the appendages.

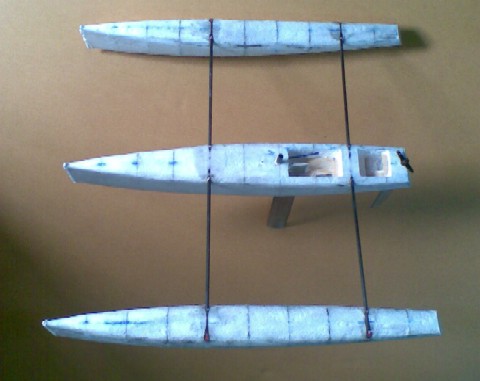
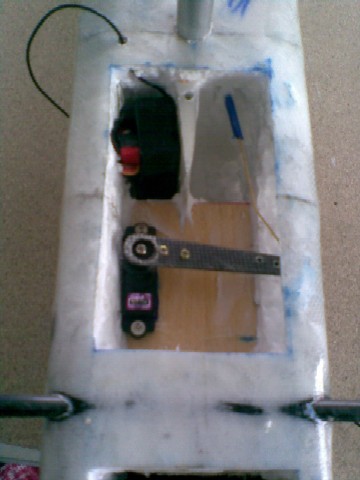
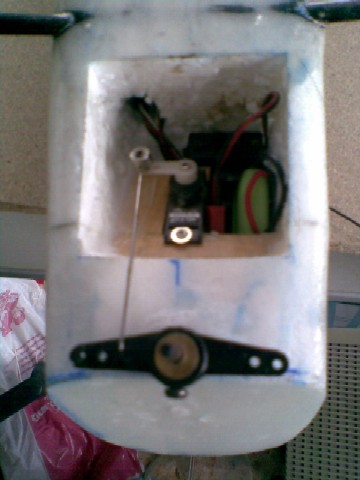
Today I will install the support tube for my RG65 swing rig I intend to use and cut the openings for RC components:)
I have cut the openings to install rc equipment and glued the mast tube for my swing rig into place. The plywood boards to attach the servos are already in place.


Next step will be to install rc components and rig the Tri.
Once you get her sailing, submit some pics or video, or a link to it, and some sort of proof that it’s 65cm long, and I will register you as the owner of sail number 1. I was sorta hoping to get it, but the first there will be the honorary number1! I volunteered to register sail numbers, the only requirements are proof it sails, and proof it’s 65cm long.
Good luck,
I hope the swing rig works well for you, but I think that multi’s usually use a large main and a very small jib that just helps tacking. Interesting to see how it works out.
Yesterday I installed all rc equipment and prepared the boat for the maiden voyage today.
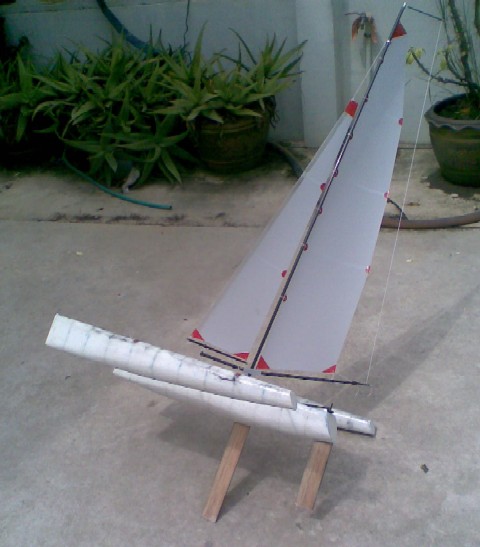
Maiden Voyage was successful - she sails
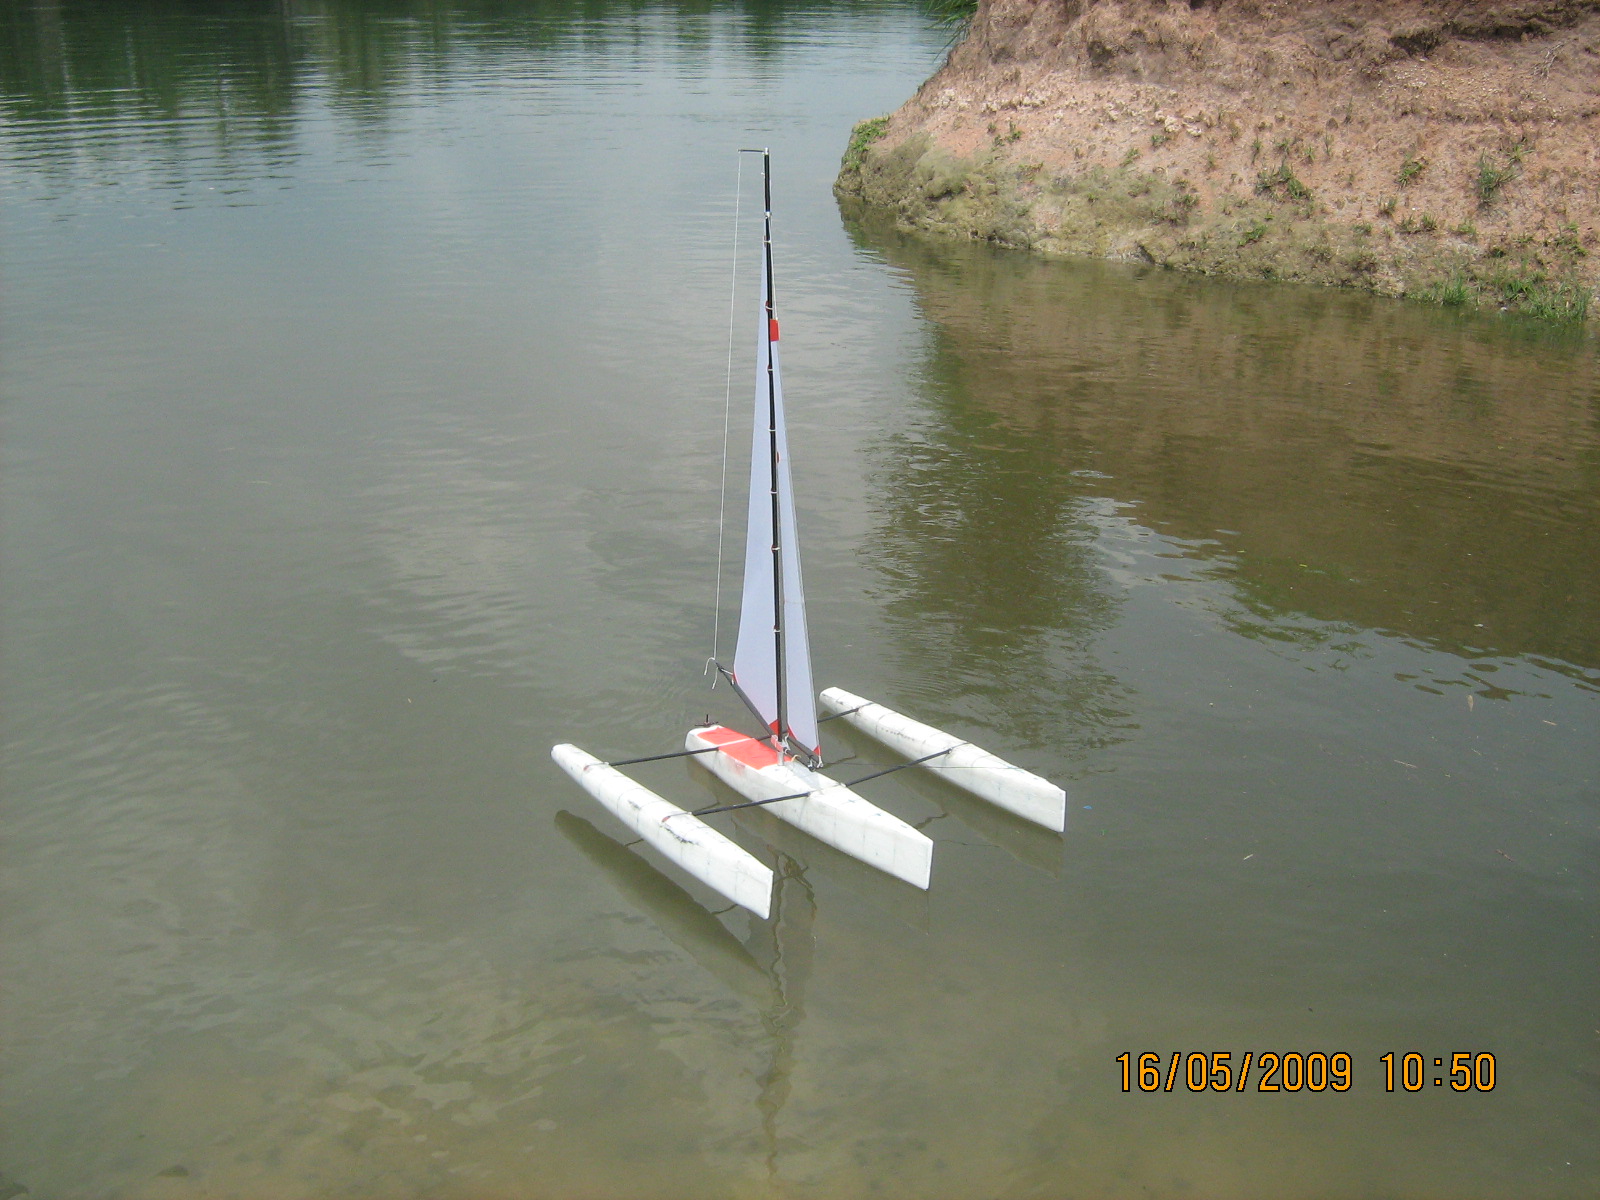

here is the first maiden pic and a pic that proofs she is 65cm long. The swing rig worked fine - we had only 2 -3 knots wind so one-floated was not possible.
More pics and the link to a short clip follows tonight - man is this complicated - doing pictures and video clips by yourself while sailing the tri with the other hand :zbeer:
Hi, Siri,
congratulations!
I am eager to see the videos! Tomorrow I will fly from Germany to the US - enough time to work on the drawings of my own RT65 (or R65M? )
Btw, is there already a class ensign?
Hi Joachim,
the guys here left it on me to choose the class insignia for RG65M, it will be a M over the number 65, I have attached a picture below.

You can look the video on my site www.rcsails.com/rt65.htm, not much exciting there was little wind. :zbeer:
Where are you heading here in the US ?
Dear Phanchita (Siri),
I think we need a good strong wind video here!
Hi all,
I have updated my zip files and included a sail and rig plan with the RT65 and RT65R zips. You can download them from http://www.rcsails.com
Happy Sailing:zbeer: