I never had that problem - and usually it goes off quicker than I thought it would. But for most of my glue-ups, I do it at night, and next day after work it is cured enought to handle.
For larger quantities, I use a single stroke into an old plastic butter dish, and then using soldering acid flux brushes, paint it on. One stroke covers just about a single hull of my multihulls which are 48" (1.2 meters) in length. I give the hull a light mist of spray glue to hold fabric in place, then use the brush. As epoxy goes on, the cloth becomes transparent and it’s easy to see any missed spots. Also. using a “dry-brush stipple” methhod, one doesn’t get too much epoxy on the hull to cause the glass to “float” on top and not adhere to the substrate. For the balsa RG-65, I have been thinning the heck out of the epoxy using alcohol or acetone (outside in garage) and it really does a nice job of saturation and sealing without adding undo weight. Only a surface covering though - NOT used for structural adhesive needs.
Good idea about a second wash coat inside if using glass in there. Hadn’t thought about that.
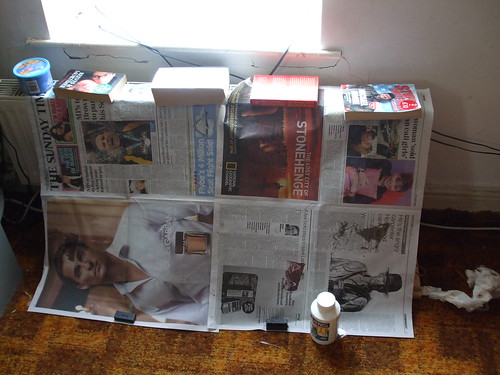
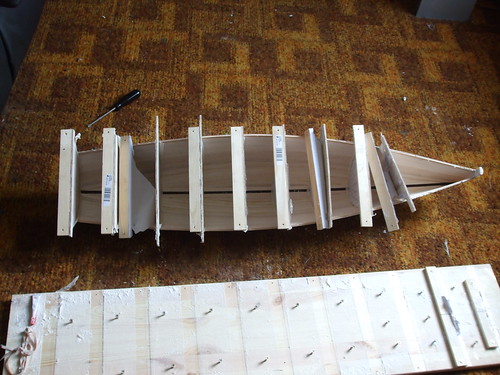
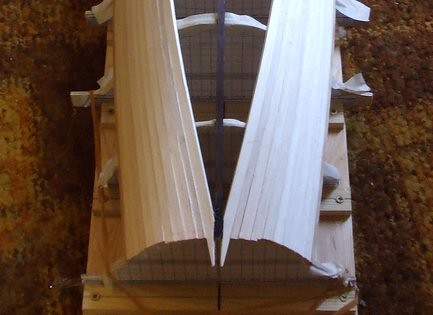
Here are the next set of building pics, not particularly exciting but thought i would document each step as i’m picking up loads of good tips.
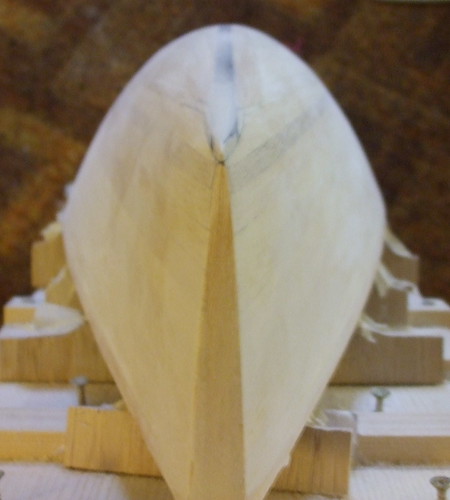
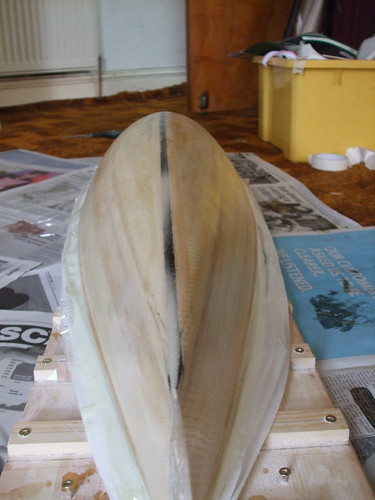
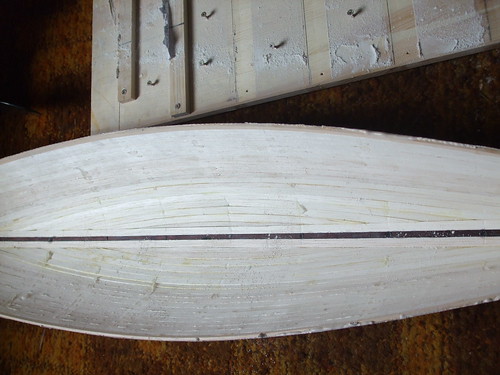
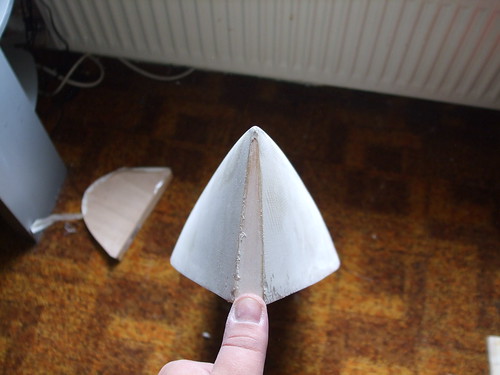
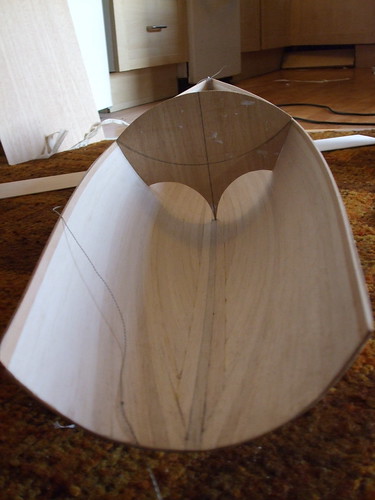
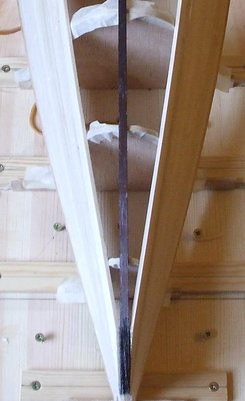
You can see on the pics that i have used the michael scharmer trick of coloring the centre plank black as a reference point later the build.
I’m hoping to complete the planking this weekend, still a bit to go yet though!
one question that has been bothering me is how do you cut those really neat holes in the deck for access to radio gear etc? I’ve got the plan in my head about building the raised foredeck and skiff cockpit using shadows on the building board so i can form the semi complex shapes required. I’ve studied how other people do it and looking at the pictures the deck is completed and then the next frame there are lovely neat holes… how do you do it? (i don’t want to spend time making a nice deck and then ruin it when i cut out the access holes!!
best idea i can think of at the moment is drilling a hole then taking the blade of my electric fret saw and re attaching it through the hole - then cutting the hole and then detaching the blade again. is this what i need to do?
yours, obviously in need of some basic wood working skills
You could cut the hole with a rotary cutter or a Dremmel with a side cutting drill bit. There is also a thin cutting hacksaw blade that attaches to an Exacto handle. Lots of options.
Cut inside the line and then sand carefully to finish.
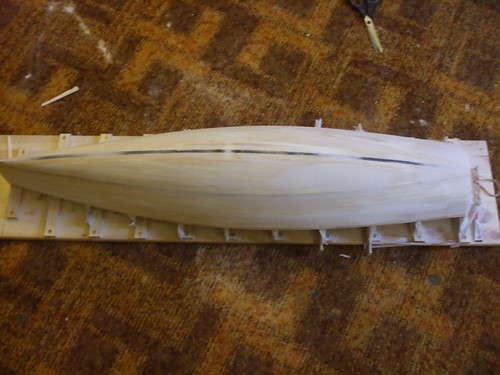
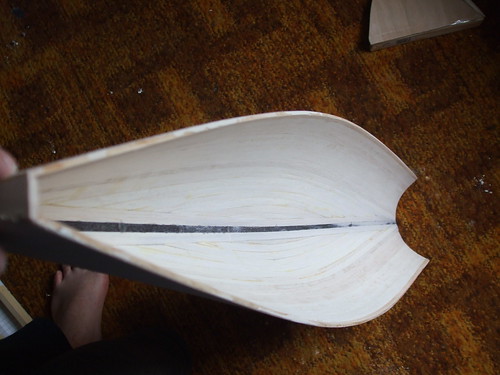
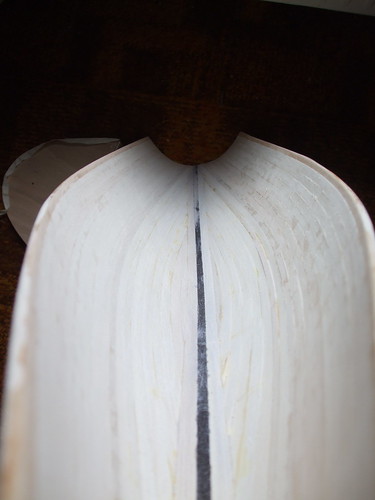
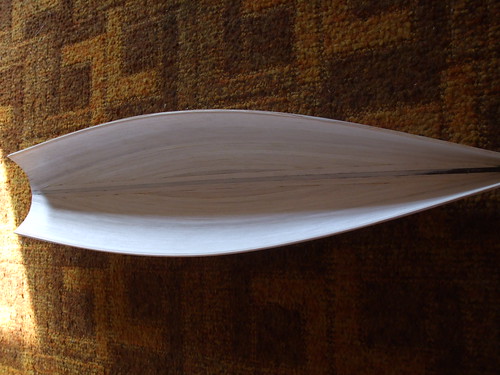
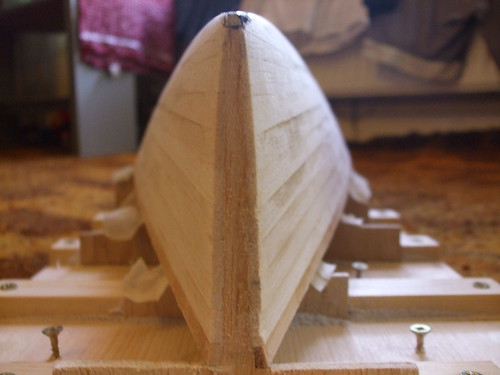
following Hew565’s advice i moved to using CA glue for the planking and consequently the process speeded up some what. The planking is now complete and while I’m happy with the end result its by no means perfect. The thing i’m most happy about is the shape of the hull now its complete and looking more like a boat. I’m by no means an expert on this matters but the shape looks fast to me!
anyway I’ve given the hull a light sanding (45 degree angle with the sand paper on plywood board) to begin the fairing process.
so far so good but there are some area’s i’m going to need to use filler to get the hull perfectly fair (well as good as i can anyway!)
I’ve got some micro balloons with epoxy i’ve ordered so thats what i’m intending to use but thought i’d draw on everyones collective experience and ask if something else would be better? (i’ve heard mention of decorators caulking being used?)
The biggest risk you face with micro balloons/epoxy is having to sand down the cured result which is much harder than the balsa around it. It is SO easy to sand a gouge into the balsa.
The one-pot fillers from the hardware store also work and maybe easier to work with. The key thing is that you need a result that will adhere to the fiberglass you will apply later.
Nonetheless, I use micro balloons/epoxy and have no problems. But just to be sure…
Keep the mix as thick as you can - the more micro balloons, the softer and easier to sand is the filler. You are not using this structurally so the strength of the epoxy is not required. The trade off is that you need to be able to work with the stuff. Thick peanut butter is about right. Marmite is too soft and honey is way too soft.
Get the fill to be as flush as possible. To achieve this, I apply it with a putty knife or a piece of balsa (or similar) and immediately scrape it off flush with a knife or piece of wood. This is where you have a problem if the mix is too thick or too far cured. The whole lot pulls out. So mix small batches and work fast. Throw a batch away if need be.
With any little bits left around the fill-zone, I rub them gently with a rag or paper towel. To the extent they are not removed, hey are at least spread very thinly and so sand easily.
You MUST be able to return to the project and do the sanding before this stuff gets too hard. The time depends on the conditions and your mix, so be available to check and test. If you can push a pin head into it - it is still too soft and will not sand well. But the moment that pin head will not go in - get sanding.
If you have any large patches of filler, and they are on a vertical or angled surface such that sag may be a problem - just apply some tape over top of the filler. This doesn’t stop the curing process, but prevents any sag and can leave a very nice finish thus saving some of the sanding effort (and risk).
I hope there is something in the above that you find useful. The boat looks great so far!
My only comment is that I have found the West System #410 Ultralight Fairing Compound to be excellent, as that is specifically what it is designed to do. It is very light & easy to sand when cured, I haven’t used the Microbaloons for this, so I can’t really compare the 2 products.
I agree, the boat is looking great! Keep up the reports.
thanks for the advice yet again guys. i’m now waiting for the epoxy supplies to be delivered so there is going to be a pause for a few days. I checked exactly what i’ve ordered and i think i’ve got the fairing compound instead of the micro balloons… Microlight 410 50gm - hope thats the stuff!
Yeah, you’re correct. I rechecked the label & it’s indeed called Microlight…with a subtitle of Ultralight Fairing Compund, so at least I wasn’t all wrong…
What you can use depends alot on how light your balsa is.
If you used contest balsa 4-6 lb you will have a tough time with anything other than light weight spackle ( like red devil) or lightly skining the whole boat with 410( so you wont have bare balsa next to patches of filler).
If you used heavier balsa 410 is great, alot easier than micro ballons, but micro ballons work too, they just dont fair out to as fine an edge.
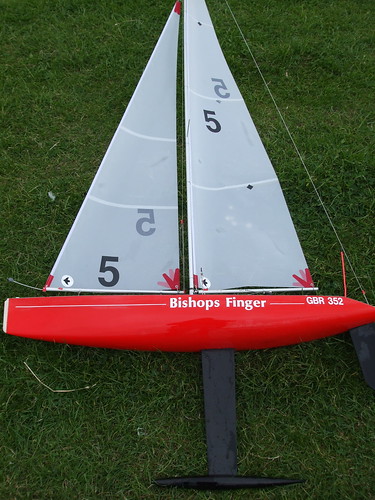
Work on the vektor has slowed in the last few days, however this may have something to do with the fact i’m now the proud owner of GBR 352…
Its a fairly old widget design with the customary flat deck that i understand was common years ago but it came with 4 rigs, 4 sets of sails (unfortunatley 2 A’s and 2 B’s so i need to cut one set of spars down and get a set of C sized sails) buts its in good condition and most importantly its been set up by someone with a lot of experience!
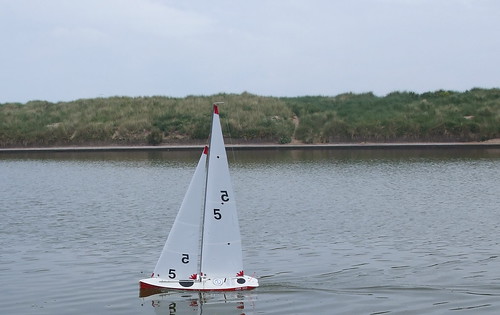
I’ve been out sailing it today and have I doubled my total experience of RC yachting to 2 hours! should be able to fit in another practice session before tuesday when racing begins in earnest!
one thing that has stuck me over the last week or so (now that i’ve handled a couple of IOM’s) is just how lightly constructed they are (i know from reading around on this forum that the US1M are even lighter!) this is probably good timing as it will make me question every gram of epoxy + filler i use to get the hull fair!
I’ve a few days off work now so should make quite a bit of progress over the next few days. will be back soon with some pictures
I’ve had a full day to work on the boat, i’ve been filling and sanding and filling and sanding. I’ve used 2 25g batches of epoxy and fairing compound which means i’ve added a maximum of 50g to the hull (reality less because much has been sanding away)
I need to do a little bit more sanding and then its time to laminate tomorrow.
I have 200gm plain weave and 280gm twill weave fibreglass which should i use? i’m leaning towards one layer of twill on the outside of the hull and then 200gm in all the load bearing areas inside the hull (centre line and keel box area etc. will this be strong enough/too light??
more of a personal decision. Are you molding from this “plug” - or will it be a “finished sailing” boat?
If you are going to make female mold to make more hulls - weight won’t matter. Your description sounds like you intend to sail it as is - so weight is critical. More weight in bulb, longer you can use the big sail in stronger winds.
I didn’t look to see if their was a minimum hull weight, although I know IOM specs keel and bulb weight as I recall. Using 200 gram (7 oz here in US) for keel support makes sense, but since you don’t intend to ride in the boat, 1 - 2 oz. (56 gram) should be plenty to provide exterior hull protection from dings and scratches, etc. Basically, you are only adding a method to tie all the strips together and provide some abrasion resistance. Consider that a full size, ride-in kayak or strip canoe might only use 4 oz. cloth on inside/outside. Inside where not seen, plain weave is fine - but some like twill because they say it “lays” better.
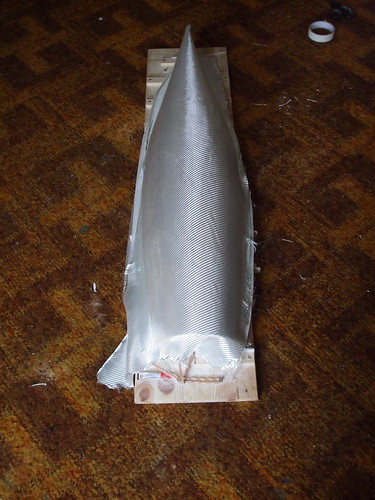
thought i would write an update while the epoxy is drying. I’ve just glassed the hull and discovered that 100g of epoxy was only ‘just enough’ to wet out the 280gm twill weave cloth by using the credit card scraping idea to remove excess epoxy and move to areas of the hull that hadn’t quite been covered properly i’ve managed cover the whole hull. every guide i’ve read has talked about using the minimum amount of epoxy and so hopefully i’ve achieved this by being so frugal!
while the glass and epoxy was still ‘‘green’’ i’ve trimmed round the edges to get a nice straight edge and now the boat has been placed in my high tech, formula 1 grade curing oven or more simply a ‘newspaper tent next to radiator curing thing’’ to bake until hard.
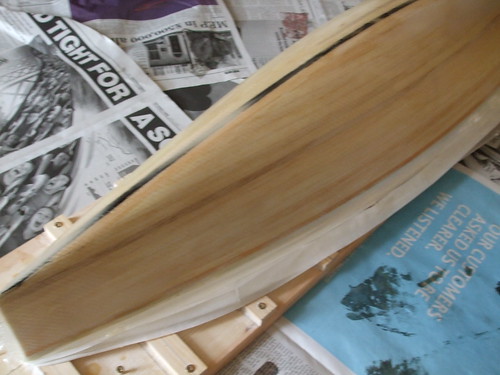
I’m now going to wait 24 hours before i think about sanding, although initial inspection now the hull is touch dry the surface does seem quite rough where i’ve squeezed out every gram of epoxy. is the idea to sand the rough surface down once its cured or to use a final coat of epoxy with a little fairing compound and then sand that back?? Obviously i want a smooth finish but its got to be as light as possible.
finally its quite a few days away but i’m itching to find out how how the hull is going to weight when i pop it off the shadows - has anyone got an idea of what i should be aiming for weight wise for a bare IOM hull? so i at least know i’m in the right ball park?! I fear with the weights of cloth Dick was mentioning i have a very heavy hull on my hands!
Tim - you want to add epoxy for strength - or in your case fairing compound since you probably have a nice strong hull - but enough to fill the fabric hollows and holes. Mix the epoxy/fairing compound really thick (peanut butter consistency) so that you will have more filler than epoxy.
Put it on and you can “credit card” it again for first layer, and then you may need a second layer. All depends on how smootht he glass is laying on the wood. If you did a nice smooth job, you may be able to get away with just two filler coats and very little sanding. If you’ve got some high and low spots in the glass, you will fill them and then sand/feather back. Try “NOT” to get into the glass when sanding, although sometimes it can’t be helped - just don’t sand through the stuff to the wood.
You can finish off any pinholes (easy to notice after primer) using green or red auto spot putty. Be sure to prime over that as it is polyester bassed and may have a tendency to soak up water - or final paint coat(s). Too bad you can’t leave the clear wood - looks like you did a nice job on the strips. If you can - then use a coat of “neat” epoxy straight from the cans and do your “credit card thing” again, sanding between coats.
Sand outside - the dust is like wallboard dust - very fine and gets into everything.
Lots of good stuff there, just a different hull design. The weights should be very close to what you should be getting. FYI, one local built a Noux and was getting about 220gms for a balsa hull, one layer of 4oz glass outside only, after filling and sanding. Add to that whatever you use on the inside, just be sure that all pinholes are filled or your balsa will swell when water gets inside.
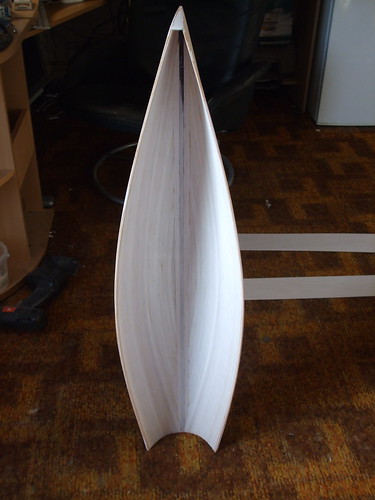
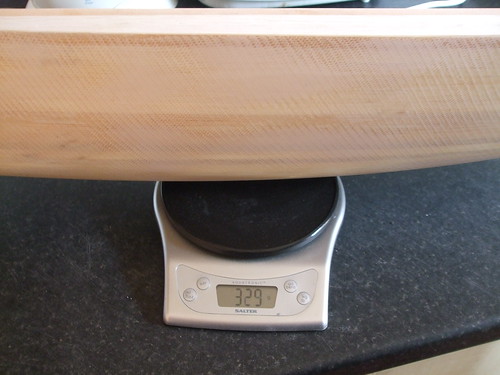
the last few days have mostly been consumed with sanding and then some more sanding and well you get the idea! its been a long slog but today i got my reward… the boat has been removed from the shadows
I had no issues getting the screws out and the shadows popped out really easily…
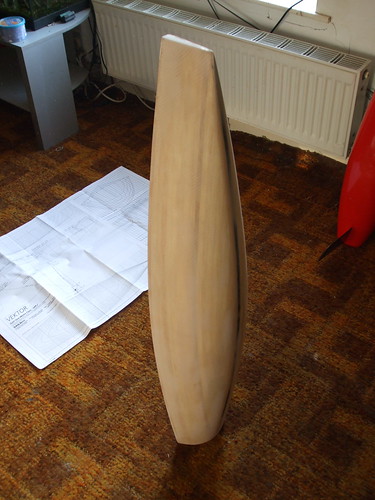
I was reasonably happy with the state of the inside but there was definitely evidence of over zealous gluing during the planking phase - at least i’ll know next time to use a little less!
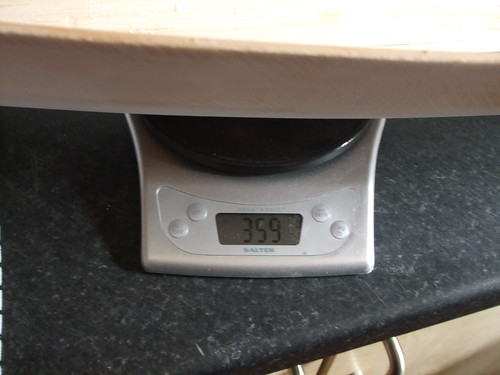
I popped the hull on the scales in this raw state and it weighs in at 359 grams…
Now according to Anders Wallin weight budget the hull shell, transom+bow, sheer wood plank should weigh in at no more than 360 grams so i’ve scraped under by one gram!! the fact my hull is so close to that mark is i think more luck than judgement on my part!!
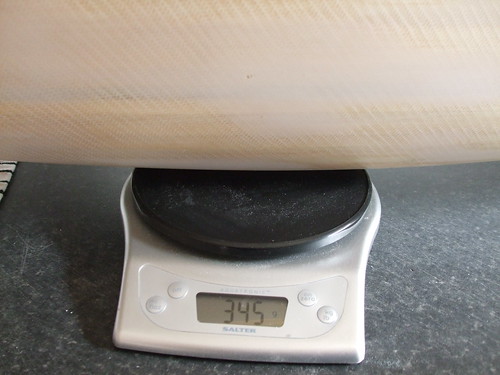
I’ve now started the process of smoothing out the inside of the hull, trying to removing all the bits of excess glue etc.
I’ve nearly completed this down one side and now the hull is weighing in at 345 grams so there is quite a lot of weight to be saved by sorting the insides out properly.
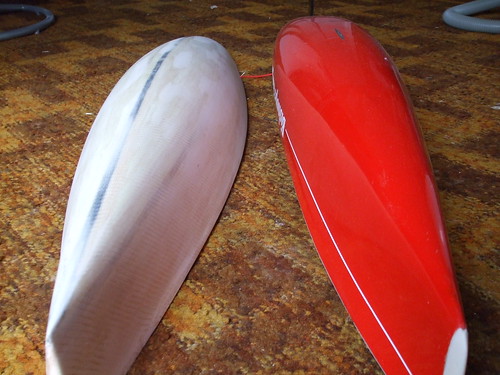
finally i thought i would post a pic of the vektor next to my existing IOM (a widget design). The vektor is a little bit wider but i’m hoping this will suit the venue i’m going to sailing at which can get very windy at times!


 should be able to fit in another practice session before tuesday when racing begins in earnest!