well gave up on the veneer for now… I ened up rebuilding the frame with a solid basswood exterior so the glass has a nice surface…
2 layers 1ounce glass. I have some black gelcoat that I may try to smear on the outside so I can have a I nice smooth surface without the need for paint. we’ll see…
Imay try to wet out the veneer and get it really pliable and then lay it up in layers over the mold so I can get proper shapes for trimming…
well the gelcoat experiment failed… as i was sanding I already sanded through the gelcoat in a few spots… so I don’t think it will work. I will probably sand it out at some point and tryto salvage the hull…
. but I went ahead and laid up another hull. the last of my stash of carbon fiber…with a “sacrifical” layer of glass so I have some room to sand if I need to…
Might be my best carbon layup yet… we’ll see in tomorrow afternoon… must resist the urge to touch it…
getting close. should get sea trials on sunday…
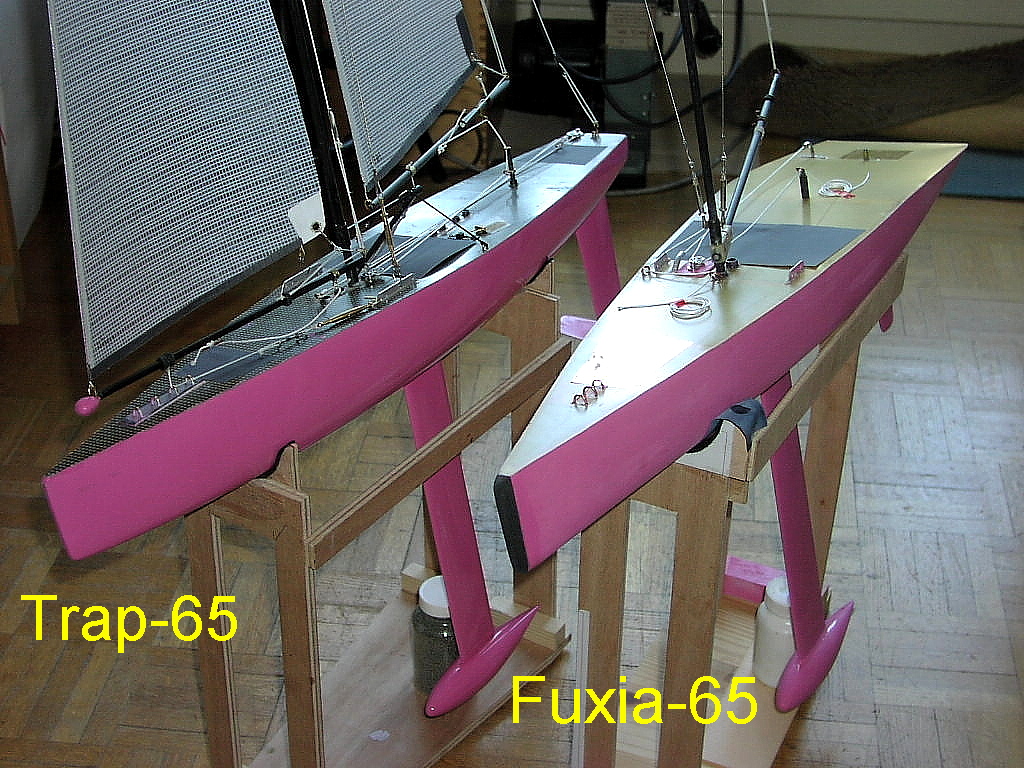
Obtuse…
ready to sail…
total weight 1140g
keel/bulb 640g
supposed to be 60* tomorrow. Might have to try her out before the sunday fun sail with the club…
Well done Mark, but for me the jib should stay closer to the deck for better efficiency !
This is why I drawn the sheerline almost parallel to the LWL from bow up to the mast step.
ClaudioD
Yeah, the club is about 1" high and the sails another 1/4"
My “swivel” is just a hook with some string.
I could probably try to bend a shorter hook, and use a shorter section of string and also try to bring the jib down a bitmore. but my fat uncoordinated fingers don’t always function like I hope they would in tying small knots in limited spaces 
Hey - nice job, Marc !!!
Now I know how my (new) Marblehead will probably look when I get it done - but in wood veneer, I hope. Claudio drew up some lines for me for the Marblehead, following those of the Azur as I recall. I wanted something narrow, with chines but I specified a fairly flat bottom to induce planning or riding up on top of the water, rather than “sinking” in to it. Had hoped to have a decent start on it by now - but it was a cruel winter up here outside Minneapolis, so no garage work yet. My first effort will be to cut the section templates and get them mounted so I can see actual form, even though I can pretty well visualize it.
I will be excited to hear how it sails. Please keep us posted.
Dick
I have a cherry veneer that I’m still going to try to make a hull out of, but it is still causing me grief as I want my veneer to be between two layers of glass…but trimming it and making the edges nice is frustrating…as it wants to split.
I’ll take the real camera with me and try to get some shots… the real test will be on sunday when several RG are on the water at the same time. being that most of them are slimmer designs and we generally have lighter winds, its probably won’t be the fastest. But it will at least look good…
Hi Mark
in the RG65 pictures the way I used to pull down the jib. In most recent models the hooking bridges are further recessed from deck surface in order to close even more.
ClaudioD
claudio, not sure the holes in the my jib track will accommodate a knot… I’ll have to play around with it today…
well it works. sits on the water lines and moves… well see how it does tomorrow with other boats on the water… wind was very flukey…
got the jib slammed to the deck…
well it works. sits on the water lines and moves… well see how it does tomorrow with other boats on the water… wind was very flukey…
Nice to see her in the water !
According to my readings, to avoid exchanges of fluxes from one face of the sail and the other, the jib foot should stay as much as possible parallel and closed to the deck plan, contrary of what picture 14409 apparently show.
Cheers
ClaudioD
yeah claudio… the first boat with this sail plan had a peaked foredeck which was more parallel to the foot of the jib…have not really felt like building a new jib…
Geez - just nice to see “water” !!! :rolleyes:
Aint that the truth…
the boat sailed well today. lot more wind and seemed to hold its own against a simpatico and a couple pakintos. so in heavy air it does well. we’ll have to wait and see how it goes in the light stuff…
You can always wish/hope for a “Blow Out” boat - but if it sails well in heavy air and if it does the same in light air - all you have to do is master your “thumbs” - this gives me a good feeling to proceed with my Maarblehead which follows a similar hull design - also from Claudio.
Dick
Dick,
based on Saturday’s. I found a bit much weather helm in the puffs. so I had the rig raked forward to tune it out. So last night I drilled a new hole for a mast step about 3/8’s of an inch further forward and it sailed much better today. and I also figured out a way to get the jib much closer to the deck.
FWIW my A rig Jib is 753 Main is 1490 which based on claudios drawings would explain the weather helm since I had a larger main and I used his location point.
Also my rudder is a bit inboard of the design which would also contribute to the change in the balance point. but i did not want to modify david’s rudder.
I still want to make one with a glass/cherry veneer…
But at the very least I now have a nice male mold and I should be able to easily pop out glass hulls if I ever get the desire…
I saw some kevlar on sale they other day…now that I’m out of carbon Maybe a kevlar hull would be in order for the next design…
I think the esterel a, which is skinnier would be a nice for lighter air…
food for thought… after watching the boat in heavy air. I think the rounded corners are a good thing, even though I originally wanted the sharp edges. Watching the water move over the hull, it seemed to flow nicely. not sure it would flow as nice with the sharp edges…
whats the best way to soften veneer to the point of being pliable like paper… Amonia???
Hi Marc:
About the chines, I think Claudio noted somewhere that they should not be hard, but rounded, but he did not specify how rounded! I did something like 1mm radius corners in my version of the Esterel-H. In my mind, this should be enough for the water to flow from one side to the other without creating a vortex.
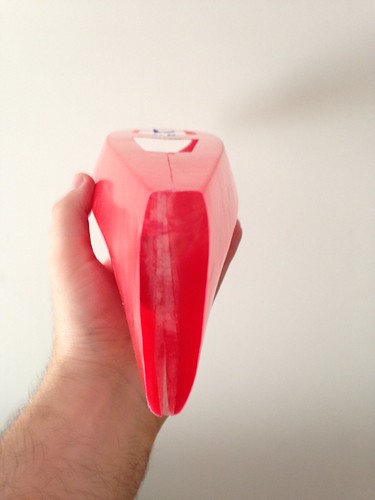
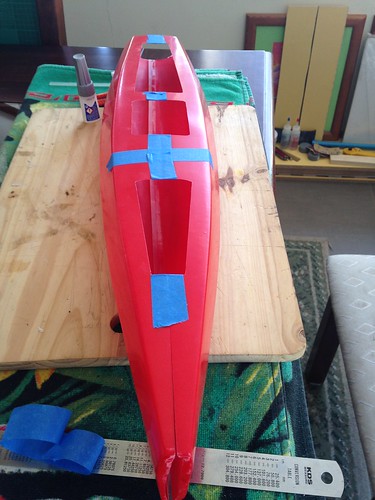
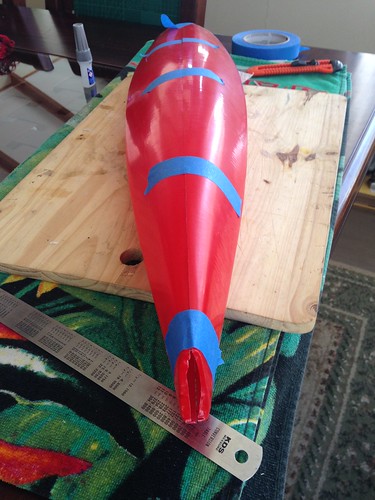
The biggest thing I did to the design, and I hope Claudio forgives me for this, is that I got rid of the bottom chines, creating a completely rounded bottom. This was me out of a huntch, without having any clue of boat design!!
Maybe Claudio can comment on the roundness of the chines and my crazy idea of rounding the whole bottom of the boat?
Some pitures of my version (work in progress). (Help needed: no idea why the pictures appear so big, I just referenced tehm from flickr as I do in other forums…)

(finally got working access to the forum!)
pretty neat rounding the entire bottom.
my chines are about the diameter of a #2 pencil…