Jeremi,
Just make sure you order a good epoxy before you try glassing again.
Happy Sailing
<hr noshade size=“1”><font size=“1”>Moderator
-Dan
Sherman Yachts
3R Forum</font id=“size1”>
Jeremi,
Just make sure you order a good epoxy before you try glassing again.
Happy Sailing
<hr noshade size=“1”><font size=“1”>Moderator
-Dan
Sherman Yachts
3R Forum</font id=“size1”>
Not only that, I think I am going to find something to practice on. I really appreciate all your guy help, I?ll keep you posted.
Thanks again, Jeremi
Hi, it?s me again. I only have one plank left on the boat and then a day or 2 of sanding and filling. Anyway, I was writing again, because I?m getting ready to order my System Three stuff and I wanted to make sure I am getting every thing I need all at once. I?m very new to the glassing process, so please bear with me.
As of now I?m going to order System Three?s: Part A General Purpose Epoxy and Part B Hardener #3 Slow, 32 oz. each.
Questions:
And I don?t think I?m going to jump right in like last time. Think something like a 6 or 8? sona tube from Lowe?s might be my second victim to try the whole process on.
I really appreciate your time once again.
Thanks, Jeremi
<blockquote id=“quote”><font size=“1” face=“Verdana, Arial, Helvetica” id=“quote”>quote:<hr height=“1” noshade id=“quote”>Originally posted by Jeremism
Hi, it?s me again. I only have one plank left on the boat and then a day or 2 of sanding and filling. Anyway, I was writing again, because I?m getting ready to order my System Three stuff and I wanted to make sure I am getting every thing I need all at once. I?m very new to the glassing process, so please bear with me.
As of now I?m going to order System Three?s: Part A General Purpose Epoxy and Part B Hardener #3 Slow, 32 oz. each.
Questions:
And I don?t think I?m going to jump right in like last time. Think something like a 6 or 8? sona tube from Lowe?s might be my second victim to try the whole process on.
I really appreciate your time once again.
Thanks, Jeremi
<hr height=“1” noshade id=“quote”></blockquote id=“quote”></font id=“quote”>
Pot Life: It is the length of time, on average and based on temperature and humidity that the catalized resin will still be “workable”. After this time, the resin will be difficult to spread and will “gob up” like chewing gum.
Filler Coats: Not sure in what context he was talking - but basically “multiple thin coats” rather than one heavy and thick coat is my guess. Possible he was suggesting several coats that have been thinned (slightly) using alcohol or acetone.
3/4 oz is more than sufficient if covering balsa. The heavier weight the glass cloth, the bigger the weave. The bigger the weave, the more resin to fill in between the cloth weave. The more resin, the heavier (weight) the hull.
As long as you lightly sand the resin, and wash off any amine blush (a cloudy, whitish looking coating - comes from humidity as epoxy cures) with soapy water, any kind of paint will stick. You can use Krylon from the local WalMart, an epoxy based paint, enamels, or the one and two part urethanes used for big boat painting or automotive paint. Just apply in thin multiple coats.
Good idea to test first. Will give you an idea of how long you can work the stuff. Mix small batches - less expensive than throwing away 3/4 of a full batch cause it “went off” too early.
Dick Lemke
F-48 #US-06
MultiONE #US-06
Class 3 Landyacht #US-196
Minnesota, USA
Jeremi,
Here no question is considered dumb; most of us acquired the knowledge we have either through trial and error, or by asking questions. Personally I prefer asking question, it?s cheaper.
If you are going to go with system 3 brand, you need to make sure you remember the following. If you measure out your epoxy by volume, then you use a 2 to 1 ratio. So for every two cups of resin you only need one cup of hardener.
If you measure out your epoxy by weight, you need to use a 100/44 ratio. In other words if you have 100 grams of resin, you need to add 44 grams of hardener to get the proper mix.
System 3 has a great pamphlet that you can download here, that has a lot of good info about epoxy.
The quote below, is one of the most important things beginners should pick up when the read the epoxy book.
<blockquote id=“quote”><font size=“1” face=“Verdana, Arial, Helvetica” id=“quote”>quote:<hr height=“1” noshade id=“quote”>The epoxy curing reaction is exothermic. This means that it gives off heat as it cures. The rate at which an epoxy resin cures is dependent
upon the curing temperature. The warmer it is the faster it goes. The cure rate will vary by about half or double with each 18?F (10?C) change in temperature. For example, if an epoxy system
takes 3 hours to become tack free at 70?F, it will be tack free in 1.5 hours at 88?F or tack free in 6 hours at 52?F. Everything to do with the speed of the reaction follows this general rule. Pot life and working time are greatly influenced by the initial temperature
of the mixed resin and hardener. On a hot day cool the two materials before mixing to increase the working time.The gel time of the resin is the time it takes for a given mass held in a compact volume to solidify. Gel time depends on the initial temperature of the mass and follows the above rule. One hundred grams (about three fluid ounces) of SilverTip Laminating Epoxy with Fast Hardener will solidify in 25 minutes starting at 77?F. At 60?F the gel time is about 50 minutes. If the same mass were spread over 4 square feet at 77?F the gel time would be a little over three hours. Cure time is surface area/mass sensitive in addition
to being temperature sensitive.
<hr height=“1” noshade id=“quote”></blockquote id=“quote”></font id=“quote”>
How I glass a hull.
? oz. fiberglass is acceptable, as long as you don?t plan on hitting, or being hit by anything. I used 1.4 oz. fiberglass on my 3R, because I intend to sail her hard. If you are going to be racing in a fleet that like to play bumper cars, you might want to step up to 2.0 oz. or even 4.0 oz. cloth.
You can use epoxy paint, but it?s a pain in the butt to work with. A far superior product in my opinion is automotive spray paint. You can pick it up in any auto parts store, it dries fast, and cures hard. Avoid Krylon at all costs.
A good thing to practice on would be a piece of 3 or 4 inch PVC tubing, you could plank it real fast, and then practice glassing it.
<hr noshade size=“1”><font size=“1”>Moderator
-Dan
Sherman Yachts
3R Forum</font id=“size1”>
Ops I see Dick replied, while I was righting mine.
One more thing, when you are measuring out the epoxy, you need to be decently precise. You can pick up digital scales online now for 30 or 40 dollars. A cheaper alternative is making a trip to your local farmer supply store and pick up some animal needles. You don?t need the actual meddle needle part, just the tube and plunger.
<hr noshade size=“1”><font size=“1”>Moderator
-Dan
Sherman Yachts
3R Forum</font id=“size1”>
I printed out all your replies and I printed the 49 page manual from the manufacturer and I’m going to review them tonight, and I?ll be stopping by Lowe?s today to pick up some practice materials.
As for the hull it has already gotten its first once over with the Dap spackle that Dan used in his web site. I have never used spackle before on hull, be honest it never occurred to me to use it, but the stuff is a delight to work with. I always used wood filler in the past, a heavier product. Oh, and I have been meaning to tell you this, but keep forgetting in my other posts. When I first looked at the Vanquish plans I said to myself, da#$ that?s a lot of shadows. I have never seen anybody use that many before, most are like 9 to11 or so. I decided that when I built it that I would cut all the shadows just to give it a try. Well I have to say, having the more shadows the merrier, this was the easiest hull I have ever made (unfortunately twice), and all, because of the doubling up on the shadows. The shape is almost perfect after you get done planking. The amount of sanding and filling is greatly reduced. Awesome way to make a boat.
Tomorrow I won?t have any time to work on it, because I?m going to be out doing what this is all for, sailing. I?ll be racing my ODOM down at Hansen?s Dam, CA, come on down if your in the area.
Thanks for all your help, Jeremi
Jeremism
The last hull I glassed was a F100, I used Carbon fibre ( 2 layers od 195 gms.m2 1st at 0/90 deg, 2nd at 45/45 deg). Ok I making a glass hull here not glassing a planked hull, but the process should be the same for a single layer of cloth.
I lay out a sheet of polythene sheet, precut the cloth to the approx size ( a bit bigger)
Mix up the resin (epoxy) pour it on to the polythene and spread it out. Lay the cloth on to the resin and squeegee the resin up thru the weave, turn the cloth over and squeegee again, remove and excess resin, repeat for the second layer of glass. Note the resin when spread on the polythene sheet and in the weave of the cloth extendes the pot life as it is does not have the volume to heat up.
Apply a light coat of resin to the hull, followed by 1st layer of cloth. Work all the air bubbles out from the hull centreline to the gunwhales and working the cloth to suit the hull shape, I wear latex goves (Doctor John).
Apply the 2nd layer of cloth working the bubbles out extra.
Finally I cover the wet cloth with peel ply and work it over the hull shape.This intends to work the ecxess resin out of the cloth giving a better cloth to resin ratio.Also the peel ply is peeled off the glass it leaves a finer weave pattern thus less sanding and filling to achieve a smmoth finish.
FYI Material weight.
Cloth 192 grms
Resin 66 grms
Sanded hull 196 grms
Here are some photos
Download Attachment: 
42.1KB
Download Attachment: 
51.86KB
Download Attachment: 
42.17KB
Download Attachment: 
52.49KB
Download Attachment: 
41.91KB
Jeremism
the only thing i would add to what has been said. Is work in a open area. and a garbage can near you. after you use a brush. it is easy to just forget about it on the end of your table. I just throw them out after i am finshed. i have built over 10 hulls. using everything i could. I use latex gloves , just incase i get some on me. cheap brushes. again just use them and toss them. you dont need a 100 page manual. it may seem that way when you first get started. but trust yourself. this is easy and you can do it
cougar
long live the cup and cris dickson
Will amend my earlier comments:
You can use Krylon - just use the “regular” stuff. The kind designed for “plastic” finishes (Fusion-I believe) doesn’t seem to harden by some reports, and seems to be subject to chips.
You can do a search on this forum for “Painting” and “Fusion” - either will give you a lot of previously discussed information and commentary, as well as tips on how some paint their boats with beautiful results. Watch for posts from Greg Vasileff who has really done some nice stuff!
Dick Lemke
F-48 #US-06
MultiONE #US-06
Class 3 Landyacht #US-196
Minnesota, USA
Well, unfortunately race day was canceled, so I had time to work on it after all. I think the reason I messed up the first one was I misunderstood the definition of the word squeegee. I was thinking a squeegee was a foam brush not a credit card like object. The system three stuff is still on the way so I decided to do a test run with 15 min A/B and alcohol. My practice object was an 8? sona tube. I planked a section about 9x14 inches, sanded and gave it a once over with spackle. I just through thing together in like 30 min. Now that I understood the definition of the word squeegee, it has turned out wonderful. I?m on the second filler coat step and it still looks great. Think I will do 1 or 2 more fill layers with sanding with 320 between. Then I?m even going to paint the test tube, just to make sure the paint that I use is what I really want. I have to say, I made this out to be much harder than it really is. Now that I understand the correct technique it is quit easy. And so far, my test tube is very smooth.
You?re probably wondering why I have a lot of experience planking and none with glassing. Well that is because I had a friend that used to do that part for me.
I’ll post, or try to post a pic of the test run when I’m done with it.
Thanks again, Jeremi
Jeremi,
The forum has a low maximum file size, I think this is why when you tried to post your photos earlier, it didn?t work.
I use this free image hosting service, and I find it works great in forums; maximum file size is 1mb.
<hr noshade size=“1”><font size=“1”>Moderator
-Dan
Sherman Yachts
3R Forum</font id=“size1”>
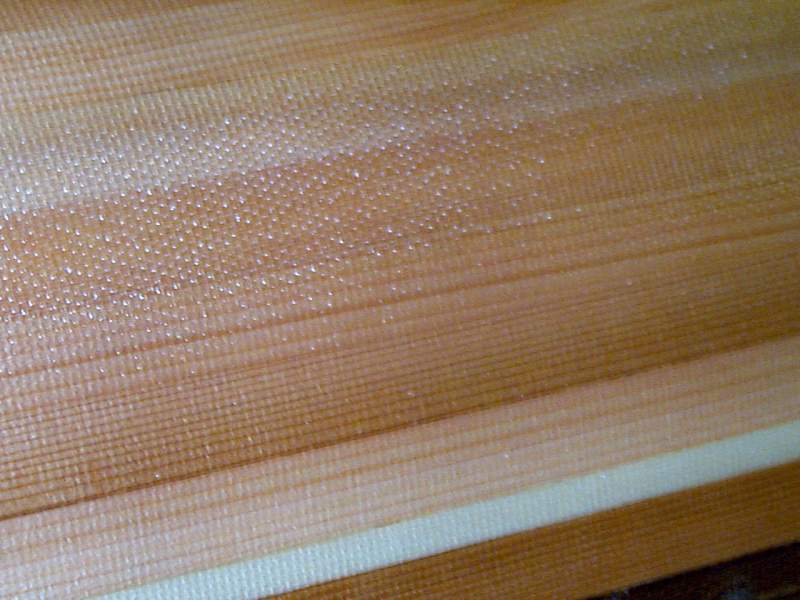
Ok, let me give this a try.

Wow, it worked. This pic was taken after the first filler coat, before sanding.
Sorry, about all the posts, just want to test something.

I just got hold of the plans from the internet and still undecided if I’m going to start building it since I got the shadows, plans and the profile of the boat. No other infos regarding this boat, like how it perform in regattas and things like that coz if I’m going to build this it will be my first IOM and just my 2nd boat. But prior to this I’ve built several boats and rig them myself for others as part of my training. I guess if you have more infos than I have please send it to me. I appreciate it very much.
Awie1753
hea all,
I just got this linky by way of e-mail today, and haven’y had time to update my website yet. Frederico Lopes, who built a Vanguish has published a website with pictures of his work.