As I promised I will start my Siri65 build log now.
The process is similar for other fiber glass boats and can be used as a guide to assemble similar yachts as well.
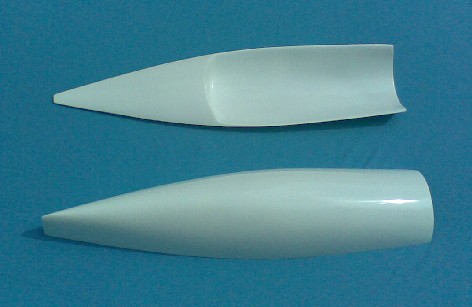
We start with the deck, hull and the keel fin of the Siri65
to assemble the keel to the hull I have to build a keel box first. I wrap the keel fin with around 5 layers of cling film and grease it with petroleum jelly. Now I cut two pieces of 100g/sqm fiber glass and a piece of peel ply roughly to shape big enough to cover the upper section of the fin. I mix some epoxy resin and laminate the two glass layers around the coated fin and leave about 10mm joint at the trailing edge. Then I cover the laminate with the peel ply to have a smooth surface and save time in sanding. I clamp the trailing edge between together.
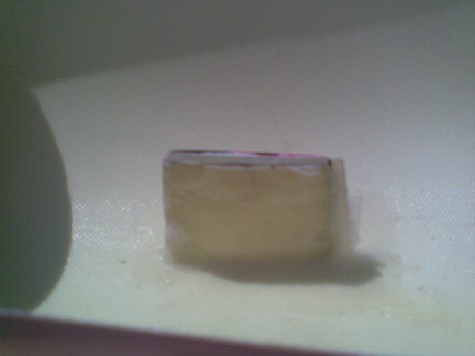
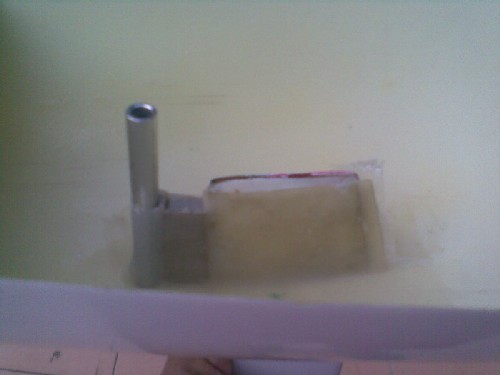
After the resin has cured I remove the keel box from the fin and trim it to shape. Now I have a keel box with perfect fit to my keel fin.
Trimmed keel box with peel ply still attached
The next step will be to cut the opening for the keel fin to the hull and laminate the box in.
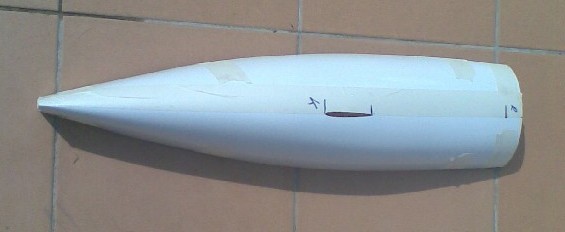
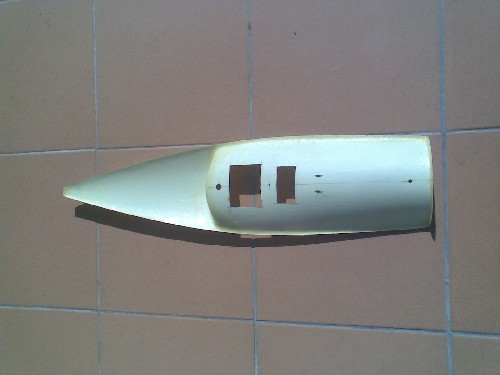
I mark the center line of the hull at several stations and join the points with masking tape laid in a straight line. Now I can mark the places for the keel and rudder according to the Siri65’s layout plan.
Siri65 hull with slot for keel already cut and hole for rudder stock drilled
I prepare the keel fin with mold release wax and remove the peel ply from the keel box. Then I prepare the joint surface by sanding it with 80 grit.After this step I slide the keel into the slot in the hull.
Now comes the difficult part. I adjust the keel with the leading edge square to both beam and water line and the chord in line with the center line and fix it in place.
Now I slide the keel box over the keel inside the hull and laminate it to the hull with some fiber glass cloth and epoxy resin. I cover the laminate with peel ply to get a smooth surface.
keel box laminated into hull and covered with peel ply
another view of the keel box laminated in- the cardboard sections are to keep the hull in shape while working on it
When the resin has cured I can remove the peel ply
close up of the keel box laminated into the hull - peel ply already removed
Next steps will be to glue the rudder stock into the rudder and glue the rudder tube into the hull
I take the rudder blade, mark it according plan and drill a hole to support the rudder stock into the top. Next I glue the rudder stock into this hole carefully adjusting the alignment to the blade.
Rudder with rudder stock
While the rudder assembly cures I build a support disc for the rudder tube with a diameter of about 20mm and a hole to accommodate the rudder tube from a piece of ply wood
Rudder tube with support disc
After the rudder blade assembly has cured, I apply mold release to the rudder stock. Now I assemble the rudder through the corresponding hole in the hull and assemble the disc and the tube inside. I adjust it to be in line with the keel fin and the water line and epoxy the disc with the brass tube to the hull. I cover with some peel ply to get a smooth surface.
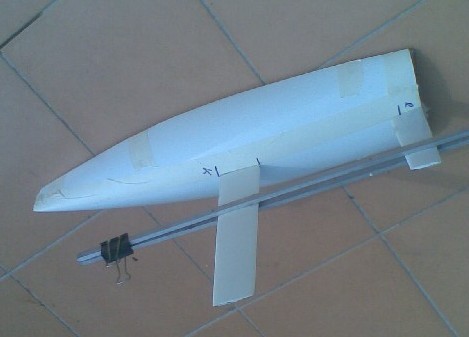
Rudder aligned to keel fin
Rudder tube epoxied into the hull - covered with peel ply
I remove the peel ply after the epoxy has cured
Rudder tube epoxied into the hull - peel ply removed
Next I will glue the pivot tube for the swing rig into the hull.
I glue a small piece of aluminium to the bottom of the aluminium tube with a drop of cyano glue. The tube is included in the swing rig kit. Now I cut a wedge to size to with the 5 degree angle and the distance between the tube and the keel as shown in the layout plan.
Pivot tube with aluminium bottom plate and already cut out wedge
Bottom plate glued to pivot tube
Now I glue the wedge in front of the keel box with some cyano glue.
Wedge glued to the keel box
Next I slide the mast into the tube and glue the tube to the wedge’s front with cyano glue after carefully leveling the mast to be center in right angle to the beam (in line with the keel fin)
Now I laminate the wedge together with the tube to the hull and the keel box with two layers of 100g/sqm glass cloth and epoxy. I cover the laminate with peel ply for a smooth surface.
Wedge and tube laminated to the hull & keel box
I remove the peel ply after the resin has cured
Laminate cured and peel ply removed
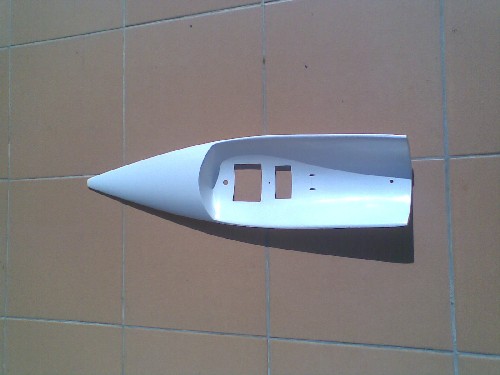
Next I will cut the openings for mast tube, rudder tube and hatches into the deck .
I mark the positions for the mast and rudder tube careful by using the hull as reference. Then I drill them and test fit the deck. I align it for a smooth fit, then I mark the hatches, sheeting and cutouts for rudder control.
Holes drilled and hatches cut
I will use pull - pull rudder controls.
I glue two small plastic tubes into the holes for the rudder controls align them and fix them with a drop of cyano glue. Then I glue them in with thickened epoxy. I cover the area with peel ply to have a smooth surface.
Rudder control tubes fitted.
While the resin cures I cut the R/C tray from 3mm plywood according the template that came with the boat.
R/C tray
I test fit the servos and test fit the tray into the hull. Now I test fit the deck to see if there is any distortion. I align the tray for a smooth fit and unobstructed servo arm operation and remove the deck when everything is fine and the trays position is marked. Now I glue the tray into the hull with some thickened epoxy. I tape the deck molding to the hull while curing the resin to ensure that there will be no distortion.
R/C tray test fit
R/C tray glued to the hull - deck taped to hull to ensure that there will be no distortion.
When the resin has cured I lift the deck off the hull again.
I slide the keel (prepared with mold release wax) into the keel box and cover with a piece of fiberglass with a hole for the keel’s retainer screw. (the piece is a a piece of scrap from cutting out the hatches) I trim the part to shape ,glue to the top of the keel box with epoxy and secure it with the keel retaining nut.
Keel box cover epoxied on
I have chosen to glue inwhales to the deck to faciliate snap in and an extended gluing surface inside - inwhales can be wood or PVC foam and can be either glued to the deck or to the hull.
I cut the shapes from 4mm PVC foam about 5mm wide and glue them to the sanded inside of the deck molding slightly inside the contours.
Inwhales glued inside deck
Now I carefully match the deck to the hull. At the transom of the sanded hull, the rudder tube and the mast tube joints I use a stripe of adhesive foam tape as barrier to prevent the resin from flowing away from the joint.
Soft foam tape as resin barrier
I cover the outside edges of the hull and the deck with masking film for easy removal of resin spills.
Masking tape outside the joint
Now I mix enough thickened epoxy resin to glue the whole hull-deck joint and fill into a plastic bag. I cut one edge of the bag open and squeeze the resin to the deck half of the joint. I attach the deck to the hull and secure in place with strips of masking tape. After taping the whole joint I insert keel fin and rudder, check the alignment and do corrections if necessary.
Deck glued to hull and secured with tape
Next I will trim the joint and glue the bulb to the keel fin
I remove the appendages after the resin has cured. I remove the tape strips now and careful trim the seam at the deck-hull joint with sand paper. Then I remove the protective masking tape from deck and hull.
deck - hull joint trimmed
Now I slide the keel fin back into the keel box, turn the boat upside down and glue the ballast bulb to the keel after aligning it to the center line and canting up 1 degree to CWL. When the resin has cured I drill a hole through the bulb and keel and insert a retaining pin. Now I filler and sand the bulb and paint it.
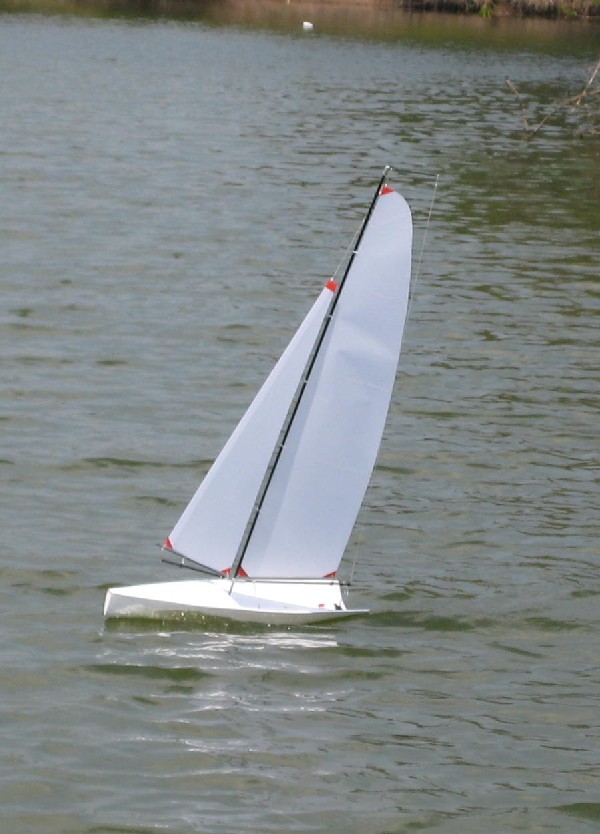
The boat is ready for rigging now - I assemble the swing rig from RCSails according to the instructions that come with the rig, join the rudder control and the sheeting. I plug the receiver in and wire the antenna.