Keel box
Take the carbon keel molding, wrap with 6 or 7 layers of cling film and lubricate with mold release wax or petroleum jelly.
Cut 3 pieces of glass cloth (100g/sqm – 200g/sqm) to rectangles 20 by 12 cm and laminate with epoxy resin on a flat surface.
Fold the wet laminate around the leading edge of the keel and clamp behind trailing edge. You can add a layer of peel ply to get a smooth surface.
Wait until the resin has cured, then gently remove the keel and discard the cling film. Trim the ends of the keel box. The keel box exactly fitting your keel is ready to laminate into the main hull now.
Main Hull Assembly
Take the main hull and mark the centerline. Measure the location for the keel and the rudder along the center line of the hull according to the plans.
Centerline marked
Keel and rudder positions marked
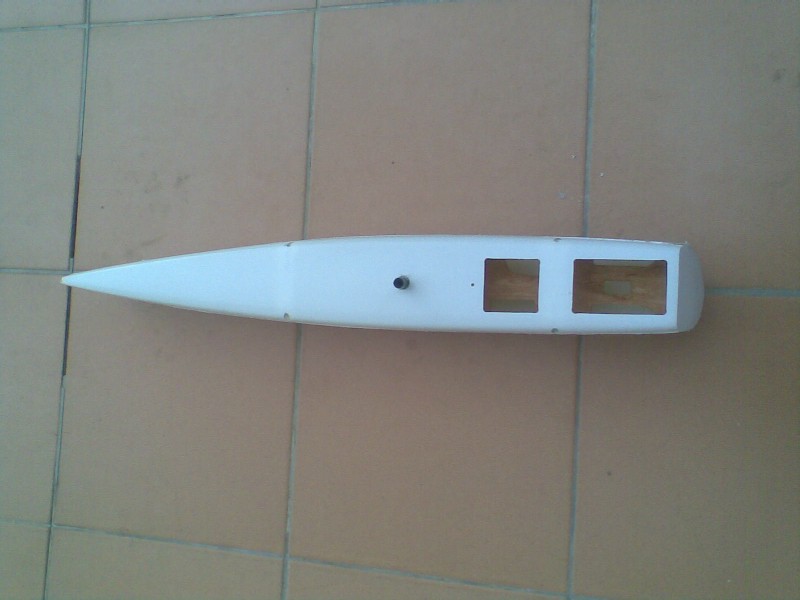
Carefully drill and cut the holes for keel and rudder shaft.
Keel and rudder shaft holes cut
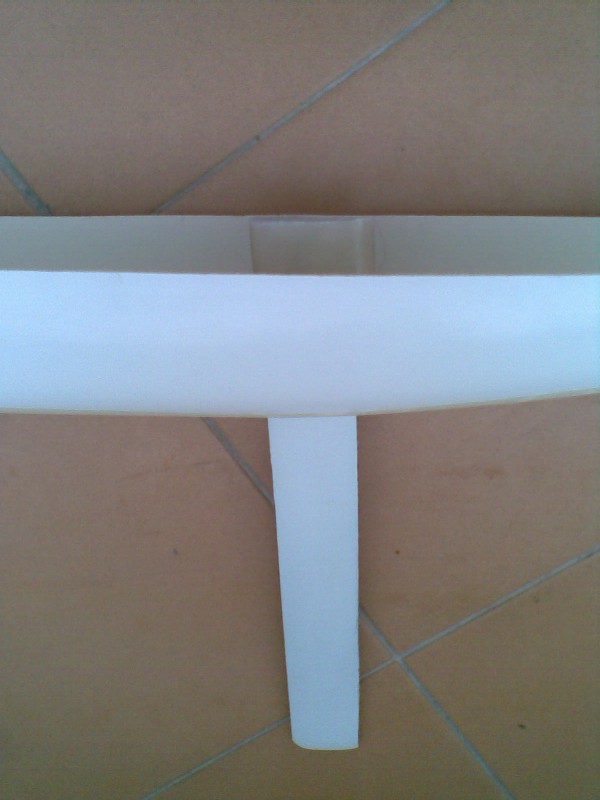
Prepare the keel with mold release wax,insert it into the slot in the hull and slide the keel box onto the keel from inside the hull. The keel box should extend about one inch above the hull.
Main hull with keel and keel box
Keel fitted in main hull
Level the main hull to waterline and beam then fix it in this position. Now level the keel according the plans and laminate the keel box into the main hull with two layers of 1 inch wide 100g/sqm glass tape.
Level the hull can be best done in a sort of cradle or a boat stand, the keel can be locked in position with masking tape.
Wait until the resin has cured and remove the keel fin with gentle force.
Take the mast tube of your choice and fix it direct in front of the keel box aligned with 5° rake and 90° to beam according to the plans, exactly in line with the keel with the help of a 5° balsa wedge and some cyano glue. Now laminate the mast tube to the keel box with 2 layers of two inch wide 100g/sqm glass tape and epoxy resin.
Double check alignment and allow the resin to cure.
Rudder tube installation:
Sand and clean the inside of the main hull around the hole for the rudder.
Take the rudder and the supplied brass tube out of the box and thoroughly clean and sand the brass tube. Clean the rudder shaft from resin residues and test fit the brass tube, it should slide on smooth. Prepare the rudder shaft with mold release wax, slide the rudder shaft into the hull from outside and slide the brass tube onto the shaft from inside hull. Secure the brass tube on the shaft with masking tape. Now align the rudder with the keel according to plan and glue the brass tube to the main hull with epoxy. Double check alignment and allow the resin to cure.
Today I will install the servo tray and sheet guide
Servo tray installation:
Cut the servo tray from a piece of 3mm ply wood according to the template supplied with the kit. Test fit your servos.
Servo Tray
Now mark the hole for the mast tube on the main hull deck. Carefully drill the hole and test fit the deck, with the servo tray laid in, the rudder tube protruding the tray about 5mm level to water line. Sand the edges of the servo tray down until smooth fit without deforming the hull.
Glue the tray to the hull with epoxy, temporary tape the deck to the hull to ensure that the hull does not get deformed.
Mast tube hole marked and drilled
Servos test fit
Servo tray epoxied to main hull
Deck temporary taped to main hull to prevent distortion
Assembly of main hull and deck:
Mark the position of the access hatches and the sheeting guide according to the template provided.
Hatch positions marked
Cut the hatches carefully.
Hatches cut
Prepare the hull for glueing together:
Sand the joining surfaces thoroughly to remove mold release residues and ensure the epoxy sticks to them well
Use foam tape to increase glueing surface at the joints where no joining surfaces are provided . These joints are the keelbox and mast tube, the bow and the transom.
Glueing surfaces increased with foam tape
Last test fit with servos installed
Tape the hull and deck with masking tape to avoid resin spills stick to the hull.
Apply epoxy to all joints and assemble the two parts. Secure the joints by taping in position with masking tape. Allow the resin to cure and remove the masking tape.
Hull and deck taped with masking tape
Hull and deck joined
Trim and filler the joints and sand the hull with 400grit sand paper. Your hull is ready for the paint job now.
Float Assembly
Test fit the hulls and decks and make them fit properly by sanding off protruding parts.
Tape the hulls and decks of both floats with masking tape to prevent resin spills stick to the hulls.
Sand the joining surfaces like you have done with the main hull and enlarge the joint surface at bow and transom by sticking some foam tape to them.
Apply epoxy to the joints and assemble the floats. Fix the joints in position by taping with masking tape. Allow the resin to cure and remove the masking tape.
Assembled float
Trim and filler the joints and sand the floats with 400grit sand paper. Your floats are ready for the paint job now.
Next I will install the carbon tube beams and RC equipment
Beam Assembly
Take the 6mm carbon tubes out of the box and insert into the holes in the main hull. Now stick the other end of the tubes into the holes of the floats. Align the three hulls to be parallel, the centerline of the main hull 280 mm apart from the centerline of float centerlines left and right. Mark the positions and glue the tubes into position with epoxy resin. Double check alignment and allow to cure.
Tri with beams installed
Your Trimaran is now ready to install your rc equipment and rig.
RC Installation
There is plenty of room to stow batteries and receiver, the servos go to the precut slots in the tray. I use a standard size standard servo with a 35mm arm for the sheets and a mini servo for the rudder. Install the batteries as far aft as possible to ensure CG at about 240mm from transom.