I am thing my next project might be a tri. What I am wondering is what size would it need to be to use my iom rigs I alread have built? or would this even work?
The MultiONE class was developed around the idea/concept that 1 meter monohull sailors could use the monohull rigs/sails on a multihull boat. My original design of IMPULSE was designed to handle a 1 meter rig and sails - and could be built as a catamaran (2 main hulls) or a trimaran (1 main hull/2 floats).
It sailed very well using a rig/sail off a 36/600 - and maximum sail area is up around 1100 sq. inches if I recall - which is truly a light air engine. You could build the IMPULSE and use your IOM rig to start. If your winds are always overpowering, simply grab some riptop nylon and keep cutting it down in size until it is manageable. You can always start small and move up as experience and wind dictate.
The free plans are very basic and simple, (3 pages 8 x 11) and the build and drawings were for a foam “plug” hot wire cut. Foam sections glued together and then used either as a plug for a mold, or just finish off and leave foam inside. I built my prototype hollow, and wold only change to making a top and bottom half - instead of left/right half. Easier to assemble and line up properly. Use the plan, copy/print to a size where the scale line is 1 inch in length, use the templates and glue between foam pieces. Use hot wire (or sander) and shape to the templates, remove templates and glue up foam. I used plastic packaging tape to cover the foam and laid up glass cloth over the tape. When cured, and with a bit of work, you can get the glass off so hull and floats will be hollow. I used a Hitec 815 winch which has more than enough power, and a double swing arm to control jib and main at the same time. My prototype looks a little “rough” but sails pretty well. I built one and sold to a guy in upper Michigan but have lost track of it.
If you do use your IOM sails, you may have to adjust to be flatter, as the multihull has more boat speed than the IOM and sails don’t need to be so full - no lead to haul around.
You can use your IOM rigs on one of my 65Ms upscaled to one metre. Take the RT65 and enlarge, this concept will work perfect and will have plenty additional buoyancy.
You can download the free plans at http://www.rcsails.com/rt65.htm
Cheers
Dick, Siri,
thank you for your advise. Dick where would I find the impulse plans? I have a A, B and C rig for my IOm so I could use any one of them.
andrew
I thought I had your email address - but I guess not. PM me and I’ll send you the drawings - they are in PDF.
Here are a couple of photos of the original (prototype) but this is with the maximum “A” rig sail which I found to be too powerful for most winds.
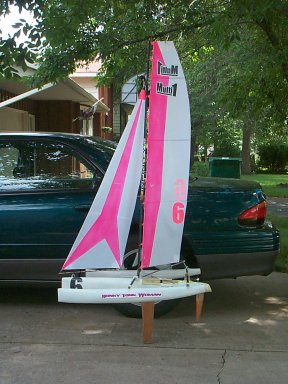
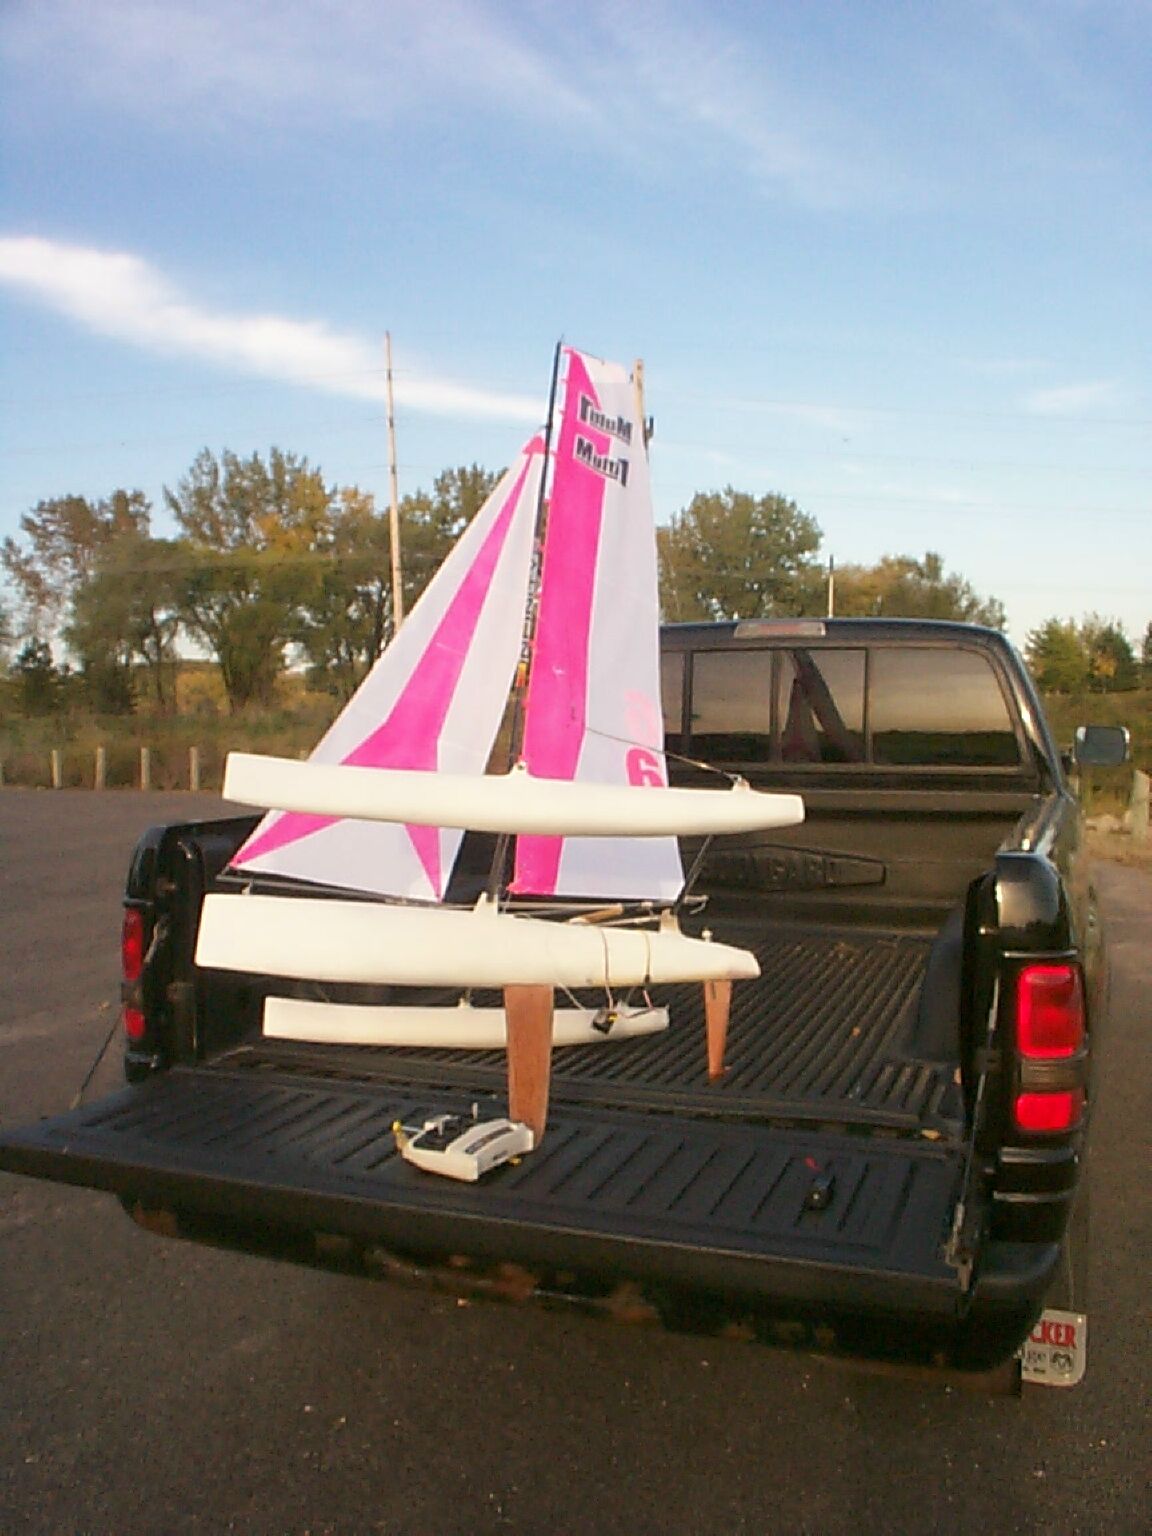
Even at only 1 meter they still are kind of a “pain” to travel.

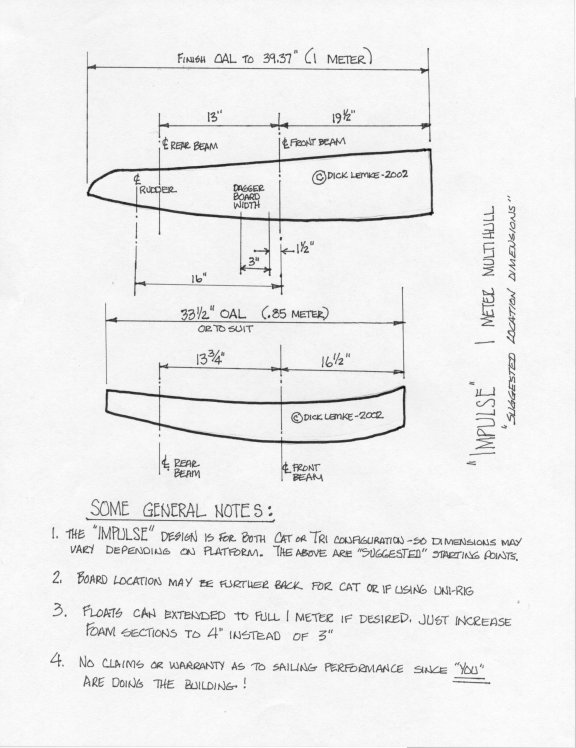
These aren’t drawn for the new-to-building person. If you have built before, they give pretty much all of the needed sizes and templates - just remember to enlarge them so the scale line on the drawing equals the full scale. All foam sections between the templates are identical in width
and you may need to provide an adjustable (fore/aft) mast mount to compensate for your sail plan - and it’s center of effort. (Small jib, move mast forward)
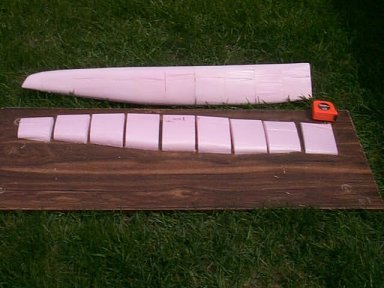
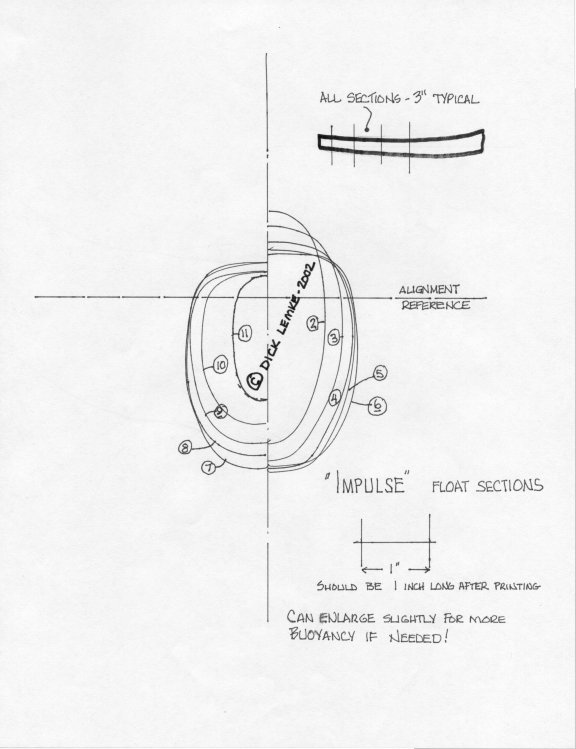
This shows the sections of foam after hot-wire cut, and when glued together. I used regular yellow wood glue as I knew the foam wasn’t going to come in contact with water. Again - I split the hull and floats vertically - you may want to consider horizontal, as it is easier to locate radio gear, board and rudder. I just found two half-hulls harder to work with than if I would have had a top and bottom.
Dick,
I appoligize, you have sent me these drawings before, but it has been some time and my mind has lapsed. Thank you again. On thought I had was to make the hulls out of blue or pink foam, same as you have, but cut each hull out of one piece length wise, maybe with a plywood stringer in the middle like a surf board. I thought I could cut two pieces of ply for the side to side template, then two for the top to bottom template. This is the way some windsurfboards are made, they attache the templates on either side then use them to guide the hot wire. Thought this will save time cutting small pieces and gluing together? Would you have side and top profiles of this tri?
Andrew
Andrew - I don’t
But - you can use the supplied templates, and while an extra couple of steps - cut them from foam (core) board and use some hot glue to hold them in place on a piece of very thin ply (nothing greater than 1/8" less is better. Just tack the templates in place using a reference line. Once in place you can connect the points where the end of each template is located along the ply. This will give you the side view profile directly on the ply that can be cut out. Getting the top view profile is a bit more difficult - but only to a point. Hope you can follow me on this part.
If you take the same half templates and cut “them” in half you will have a quarter template. Once again, using ply you can draw a reference line. This will give you a “quarter template” and here you need to keep your template pieces in order and in proper rotation. You want to hot glue (tack) them down so they will look like one half the width of the boat if you look down from above on the template. Again, connect the outer most points of each template and you should have 1/2 of the width of the boat on the plywood. You can use that plywood piece to create the mirror image of the other side top view. Sounds complicated, and perhaps I can work on a drawing to better explain.
When done, you should have 3 pieces of ply:
1. will be a single piece that is the complete side view profile of the hull. If you look at the pink pieces in the lower part of photo, it essentially describes the profile from the side if you connect the outer most edges. Sorry for confusion here - just not sure how to explain it.
2. will be two pieces of ply that when the straight edge of each touch, should give you the top view profile of the hull.
Obviously if building a trimaran instead of a cat, you will have to do a similar effort for the float (but use it twice - once for each float)
If I read your explanation correctly - if you look from the bow or stern you will have a cross of thin ply? The only place you really need ply is for daggerboard, and cross beam attachment points. I left a vertical piece of ply in forward of main hull for my jib attachment, but made the prototype a bit heavy and so on the other one I inserted a 1/4 x 3/8 piece of wood along bow deck to hold my screw-eyes for jib attach. MUCH lighter.