Chris Docks Design Competition

I know that my dear friend Mr. Trewin circulated UK Footy owners with Details of the 2008 Chris Dicks Design Competition - not unreasonably, since it is stricyly open only to UK entries. However, I am not sure whether he gave it any wider publicity.

In past years a tradition has grown up of all entries submitted being included in the graphical results presentation but for foreign entries to be marked ‘Disqualified’ and not be ranked. This may not be the most dignified procedure known to man, but it does mean that the results become a sort of ‘mini-directory’ of latest Footy thinking.

If case anyone from abroad wants to ‘non-enter’, I attach a copy of the rules. As you can see from these, the amount of room (on paper) that an entry can take up is fairly limited, so they are not too hard to put together. Even if you are of the ‘whittle-and-be-damned’, a few decent sketches and photographs should go a long way.

I look forward to seeing some of those facinating American, Italian, etc. boats. :zbeer::zbeer:

Next week, I will introduce my no-entry to the contest : a “modern classic” cruising footy…

stay tuned !

Flavio

Flavio ~ you are priceless:)

Don’t you just love thoes foreign language idiosynchracies? Especially the eastern Asian languages. :slight_smile:

Due to the fact that no official news have been released about the contest, I will take the freedom to give notice that 35 entries have been received
No so bad …

Flavio

Angus, I am sure your good friend Mr Dicks would be very pleased as I would, if you would take a couple of minutes and correct the spelling of his name in the heading of this thread.
Sorry mate, but it bugs me every time I read it. Thanks and best wishes.:zbeer:

Flavio,

Just for the record. The number of entries for this year’s Chris Dicks Award is 11 . The 35 number you quoted is apparently the total number of entries since the competition started 4 years ago. I’ve just read a mail from Roger Stollery which quotes these numbers.

Between you and me, I’m quite pleased you are not eligible. If you had been allowed to submit Presto with the actual written submission presented like you have shown us in another thread, then the rest of us might just have well retired gracefully :rolleyes:

Cheers,

firstfooty

Correct…

Roger wrote to me too about “… 35 entries so far”

My improper intepretation was relevant to this contest, but now after reading once again his e-mail ,it seems that my english could be improved a bit.

( by the way , to be fair, please note that I have posted preliminary plans of Presto after contest deadline.)

Even if I am self disqualified from the beginning, I have informed Roger about the news about rule interpretation of bowsprit on diagonal hulls.

When this point will be clarified I would like a plank on frame version of Presto showing same degree of craftmanship of your wonderful Mistralette.

Flavio

Congratulations to FirstFooty* on his win in the competition, and to Angus for his fun-and-serious second places.

Also congratulations and thanks to Flavio for his entry, or non-entry, a lovely presentation and a boat which will give a lot of pleasure. If you care to share the buttock lines with us, Flavio, I will make one (even though you are a foreign person!)

*Your nom-de-plume is getting, like the HHG trilogy, increasingly inaccurate

andrew

Dear Andrew,

many thanks for your nice words about my entry “Presto”

I will post here the study plans that I have already disclosed on another topic of this forum.

I am happy to know that you are looking to build one of them ( even if you are not Italian :wink: )

I will release final drawings and building manual only after completion of testing, modifications and sea trials.

Most probably everything will be available during first days of next january.

Flavio

Soory -I forgot - here are the results!

A.

Hi “firstfooty” ( now “first of the footy” ),

looking at your nice mistralette presentation page, there is a small picture of an interesting detail that I feel it would be nice to investigate : your ballast casting technology

I am one of the few that have almost put on fire the kitchen aiming to have a something better than the usual fishing sinker.

Due to the fact that my local model shop is not selling tungsten ( neither osmium or uranium ) , and due also to the fact that I have not a lathe or other advanced tools, I would appreciate to know more about your advanced “know how”.

Flavio

Folgore ITA 5

ps: this a documentation of one of my first dangerous attempt to lead casting

Flavio ~ you may wish to consider Peter Hubbards method of using lead shot and resin. This offers a COLD and safer way of dealing with lead that does not involve either melting it or filing it. It also encases the lead thus keeping out of harms way.

You can either make the casting in two halves or do as Peter does and cast it straight in to a copper tube and then use some car body filler to shape the ends

It has taken me a little while to recover from the blow of not being Italian - I ride a Ducati, and honeymooned in Venice - does that not count for something?

And I had been thinking that we might have arranged an entry in next year’s Chris Ducks award for the next (gaff-rigged) design from that talented Brit, Mr. Frank Fanshaw (spelled Featherstonehaugh).

Flavio - thank you for the outline details of Presto; I look forward to the detail when you publish that. As you say so rightly there is a lot of pleasure in carving and sanding a beautiful hull!

On your lead casting I have a few comments which are (of course) intended to be helpful (and confirm that you are being safe). Plaster-of-Paris is OK as a mould, but it needs to be dried VERY well to be safe - I am sure that you know that. I am also sure that you are using protection for your eyes and all other sensitive parts.

The no-temperature method described by Andy is simple, and another of the same is used by the Gary - he cuts shapes from lead sheet and epoxies them together - then smooths and fills as required

To make a slot for a keel you can use a piece of aluminium wiped with wax or grease - this will come out of the lead cleanly and leave a nice slot.
I do not cast in PofP because I prefer either:
wood (ordinary soft wood) which will do about 4 or 5 castings - getting a little bigger each time:D
or (my favourite) lightweight foamed building block - we have them here as Thermalite. They are soft enough to easily cut and sand the right hollow and are not affected by the heat (but make sure they are dry)
Silicone - ordinary RTV silicone (bathtub goo), or better still a 2-part silicone made for mould-making. Will stand boiling lead for as many casts as you will need.

Points to avoid - do NOT use foam styrene for the mould box - even balsa is better

andria 'alstedi

Flavio,

I must apologise up front for this being a 100% wordy explanation, but I have no other photographs other than those you have seen. I will remedy this with my next moulding.

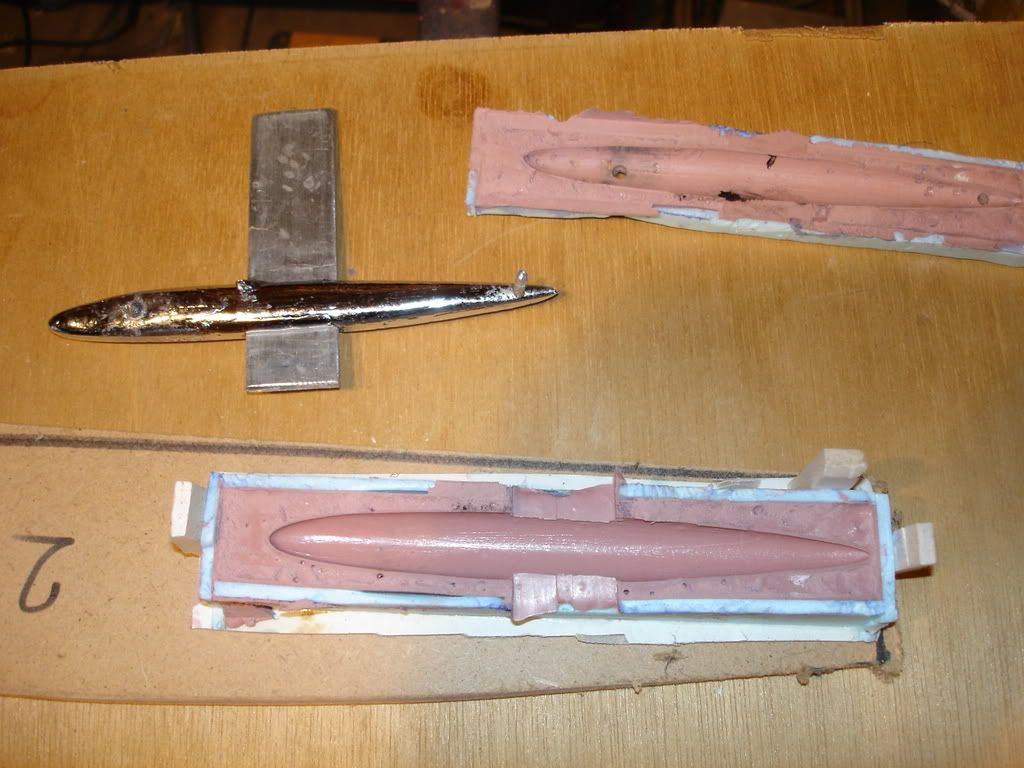
For the bulb shape I use Marko Mijic’s Bulbcalc spreadsheet from a link in Lester Gilbert’s pages. This allows you to design any number of aerodynamic shapes - I normally use the default NASA 00XX shape from the drop down list - and any weight/size combination. Footy size bulbs are below the minimum default weights, although you can cheat to overcome this limitation.

I then turn up the shape on a small lathe - sorry about that - complete with an integral pouring section at the tail end.

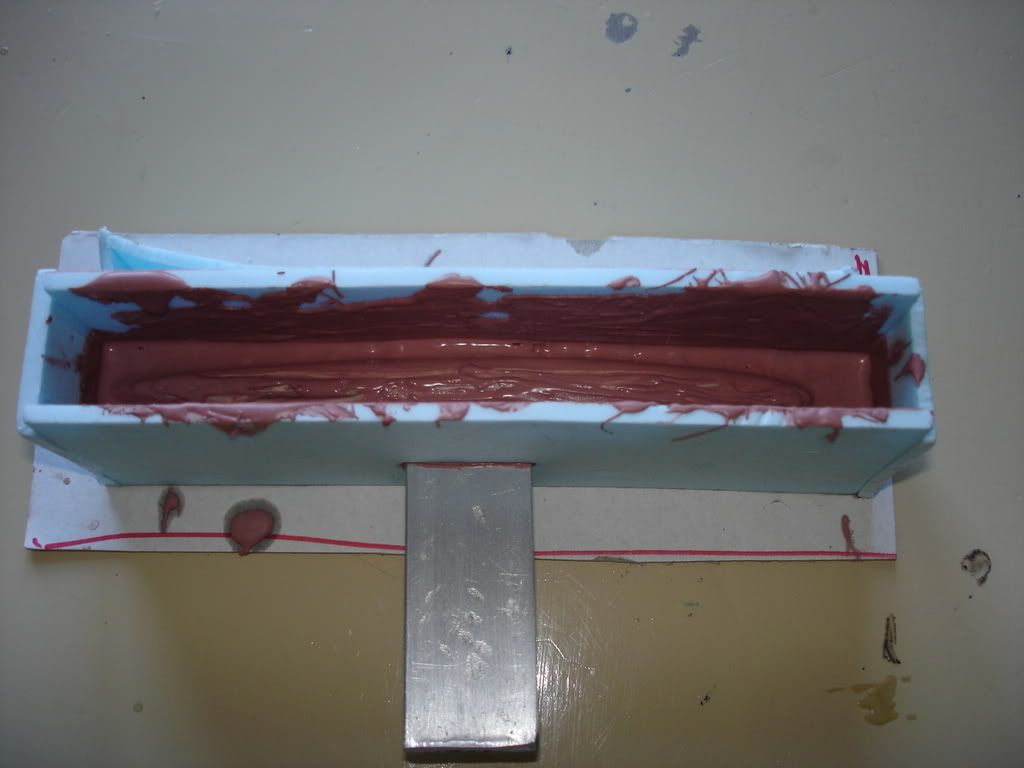
The moulding process is very similar to yours using Plaster of Paris except I do it in two halves. I make up two identical moulding boxes from MDF board, one with a bottom and the other just the sides with the corners suitably stiffened. First coat the pattern with vaseline or grease and line the box with kitchen film. Hold the box components together with tape to make it easier to remove the paster cast. Then nearly fill one half of the box with the plaster and quickly insert the pattern up to its half-way point along the centre of the box and touching the box end at the pouring feature. Before the plaster sets insert a couple of large ball bearings up to half their diameter, also covered in grease, one near each corner of the box. These ball bearings will act as location features for the two halves of the box later on.

When the plaster has solidified make sure you can release both the pattern and the ball bearings. Ensure the pattern is clean and recoat it and the upper surface of the bottom mould with grease ensuring the ball bearing holes are greased too. Reinsert the pattern but not the ball bearings. Locate the box with only the four sides over the lower box and then fill with another plaster mix.

When this mix has solidified gently separate the two halves of the box and remove the pattern and the box sides. You now have two halves of the pattern and a moulding box with little indentations in one half and pimples in the other - these are the location features.

These plaster mouldings now have to be dried completely. This is probably more important with this enclosed method of casting that with your semi-open method. If there is any appreciable moisture left in the plaster then when you pour in the lead the moisture will try to evaporate and cause bubbling of the lead which my blow back up the feeder hole or even crack the moulds. I generally put the plaster casts in the kitchen oven at about 150 degrees for a couple of days. This isn’t too expensive as at this very low heat the thermostat keeps tripping out ! !

When dry, hold the two halves together with a small clamp and stand it vertically on a large sheet of cardboard in case of any spills. Like you, I heat up the lead over a kitchen ring – although not as clean as yours – and I just use a small seamless tin can with a poring spout formed by pinching with a pair of pliers. The handle is a small locking wrench. When the lead is up to pouring temperature and is good and shiney – 10 or 15 minutes after it has all melted - very carefully and slowly pour it into the mould.

I have experimented with separate breather holes and risers and also poring with the box on its side or at a slight angle, but in the end the most reliable method is just to pour vertically directly into one end. Just ensure that feeder hole is big enough and that you pour slowly enough to allow both the lead to go in and the hot air to come out. Be prepared for the odd disaster before you perfect the technique. You’ve seen the surface finish I get – not very good. But after a good sanding it looks fine although not as good as Andrew’s. I then dig-out the fin slot with small drills and a milling cutter. Andrew’s system of using a grease coated steel bar looks good, but I don’t have the confidence in casting the two half mouldings accurately enough to ensure that the bar remains in the middle of the finished bulb. I have the drills and the milling cutter so I use those.

I trust is of some help.

Cheers,

firstfooty