OK so I’m going to try my hand a building a hull… I like Dicks method that he shows inthe rg65M build. using the foam stations and then sanding the entire hull. looks like a quick easy method. but it appears you coudl very easily impart twist or any other number of errors if you are not careful.
The other method would be a building board, cut the station out of ply and then mount them and plank away…until you have a shell. and then go to town…seems to be a more exact method, provided your boat is build properly and is true…and your stations are mounted well
so my question…which is better
is there a way to make an adjustable building board or is that just a way to in part more potential for error?
if I build a board for an RG I should be able to reuse the board again and again or is it a throw-away item?
If I build a board for a much larger boat, can I modify the board to be used for a smaller boat such that it can be re used?
I’ve reused a few building boards, most notably for stars and rg65’s. I just used a couple pieces of 1"x4" poplar, screwed together into a T. Then, I screw blocks that the stations are glued to in the right spot, or sometimes i use brads that are not driven in all the way. So yes, it is doable. I prefer planking the hull with balsa and a very light layer of glass. I’ve tried foam, and discovered that I just don’t have the eye for carving. Some people really enjoy that method, but don’t think that it will save you any time. You have to be meticulous with your finishing to get a good hull.
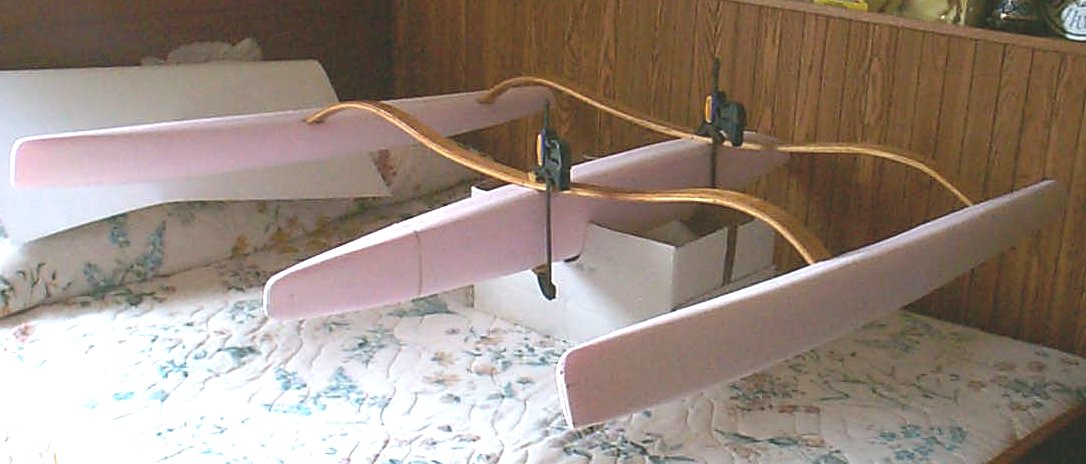
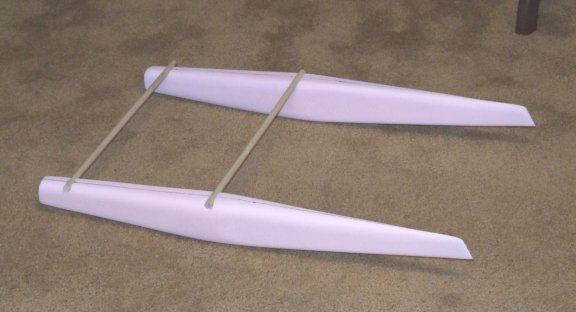
I’ve done hulls several ways using foam. The first was a prototype for a 1 Meter trimaran. I used aluminum stock from a seamless gutter company (end roll) and laid out 1/2 of each template and cut with bandsaw - then filed to remove rough edges. The foam was cut into lengths to equal overall 1 meter once aluminum was removed. A waterline was drawn on the side and one edge was the center line of hull. I then used a plastic clamp to hold the aluminum template to each side of the foam piece, and used a hot-wire to cut foam, following the aluminum template. This gave me a form that was cross sectional - but larger/smaller at each end. After completion, the templates were reversed and the other side of the hull was cut. I made them all slightly larger to allow for sanding/fairing as sometime hot-wire was too hot and I got some waves during the wire draw across the templates.
The photo below is of 1/2 of the main hull - one side glued up the other still in sections. I used regular woodglue, as it was covered with packaging tape and then 2 layers of 4 oz. glass cloth.
For the F-48 (Water Resist design) - I followed designers recommendations and cut one piece hulls using top and side lines to follow and then rounded them off.
Finally the 65M cat which replicates an “A” Class cat, was a lined piece of foam. I bandsawed tide profile and top profile and then shaped by eye from there. I had done sailboard back in mid-80’s so the eye/hand coordination was pretty good, so for the 65M it was only rounding/shaping - after the basic shape had been cut out.
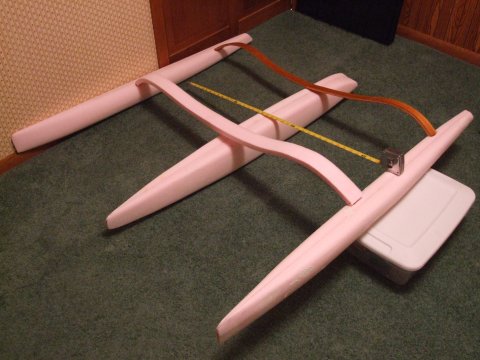
Some can and some can’t work “free form” very well - but after nearly 20 years of racing beach cats, I can easily spot a good design, and then modify from there. Actually, the 1 Meter was designed as 2 boats - a catamaran using two main hulls, or a trimaran using a main hull and two floats. A couple other cat sailors spotted the main hull which strongly resembles a Formula 18 big cat from NACRA.
Probably enough photos to give you an idea of the variety of ways you can shape foam.
thast the “easy” method I was thinking about. Never though about a hot wire…I guess if I go with foam or building board, I still need to put the station cutouts on wood or some other durable media, otherwise when I start sanding for shape I run the risk of sanding beyond the lines…or if I iuse a marker to outline the station is it enough of the “warning” to make sure I don’t over sand?
in theory, could I use hot glue to glue the foam sections together after hot wire, before sanding? or should I just get a some of the west quick hardener?
all great info guys…
I’m reviving my idea of an albacore hull… and I’ve printed out 20 stations. way to many I’m sure…and she’s a wide body…proably too wide…
I guess I’ll figure something out…
might as well knock up a blue splash while I’m at it…
I would use something hard to define the stations. 1/16 ply should work well. also plain old white or wood glue works fine for foam. No need for anything else.
As John notes, water-based glue is fine for gluing sections together. Keep glue from edges as it is harder to sand than the foam - hot glue is simply a Bth to sand - too rubbery. I use 80 grit (Floor sander paper-back) for general shaping. If you are doing a one-off - even the cardboard from backs of legal pads works OK and “YES” to the idea of coloring the edges to make them easy to see. Swing by a local print shop and ask for a couple pieces of “chipboard” (cardboard) - they probably will give you a couple of pieces. If you use hot-wire, then try aluminum sheet stock for templates. Thin ply will have a tendency to burn and you will see the notch in the foam that matches the burn mark in the ply. If someone has a decent wire setup there is less tendency to burn a “notch” from too hot of wire.
Are you using to make a plug - or laying up glass and “melting” out the foam?
Of course any one develop his own method .
My best results are obatained with bristol carton used also for printers, they are some 300g/m²
The edge are colored with marker , black or red or blue are ok, as Dick says .
My esperfience show that the shadow shall no be made of harder material then the foam since there the risck to get a polygonal shape where the foam outcome flat between two shadows. It is also better, in my opinion, to avoid put glue too close to the shadows edge, since once dried, it become harder then the foam.
Cheers
ClaudioD
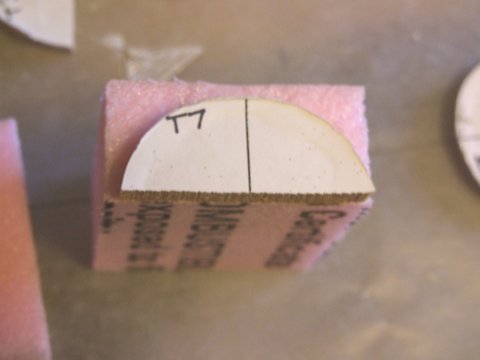
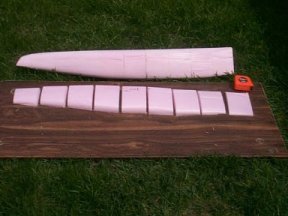
I printed out 22 stations. and then ended up only using 11 I then used Spray adhesive to adhere the paper cutouts to the foam blocks. and then trimmed the foam blocks to the paper.
then I realized that you need to be mindful of how you trim the block. since moving from the bow tot he stern station 1 is smaller than station 2, which means between station 1 and 2 the block needs to be at least the size of the station 2. and at one point as the stern narrows you need to be aware that the aft station is smaller than the forward station so the froward station needs to be larger than the aft… so you have material to shape…duh…
I did not put any ply on the stations. I figure I still can do that and then glue and sand…
Hot glue.
yes it rubbery and not easy to sand, but if I kept the hot glue more toward the center of the stations Id not have to worry about ever encountering it with the sandpaper…
I liked Claudio method of wrapping the blank with packing tape and then using it as a male plug. But I also have access to a an oven and a vacuum form so using the foam plug to make a styrene hull is also an idea for a quick hull assuming the foam would hold up to the vaccum
so this might also be more of a “scale” model than a racer…so I am contemplating a wood hull as well. in which case I would need to do wood stations on a building board…
I have some nice cedar strips laying around that would make a pretty hull…
now whether or not it would have traditional low aspect sloop rig or some other rig who knows…
Hi Marc
I have had problems with hot glue in situations like this, although not with foam. As you are applying the bead of glue the beginning of the bead starts to cool and if you are a little slow it won’t compress as easily as the warmer end. This causes misallignment of the blocks which is something you don’t want. You aslo have very little(if any) repositioning time.
Don
Hi All
If I can stick a question in here? How do you guys align the blocks of foam/shadows? Do you run a spine down the building board and slip the blocks over it or??? Maybe someone has already posted this somewhere and I missed it.
Thanks
Don
Having done several of both types of builds, I would favor the plank on stations instead of the foam carving. It is about the same amount of time, but I think you get a more accurate reproduction of the design.
Don’t forget to use a center line on the stations or you’ll end up with a banana or worse.
Print 2 of each station put #1 and 2 on the first block. second #2 and #3 on the second block.
all on the center line.
don’t know how your going to easily see when you get to the paper when shaping.
my plan is to mark the station/foam edge with a sharpie. general idea being that you don’t want to sand off any sharpie marks. Everything else is fair game…
I did notch all centerlines, top and bottom and also deck location.so I have multiple points to line up
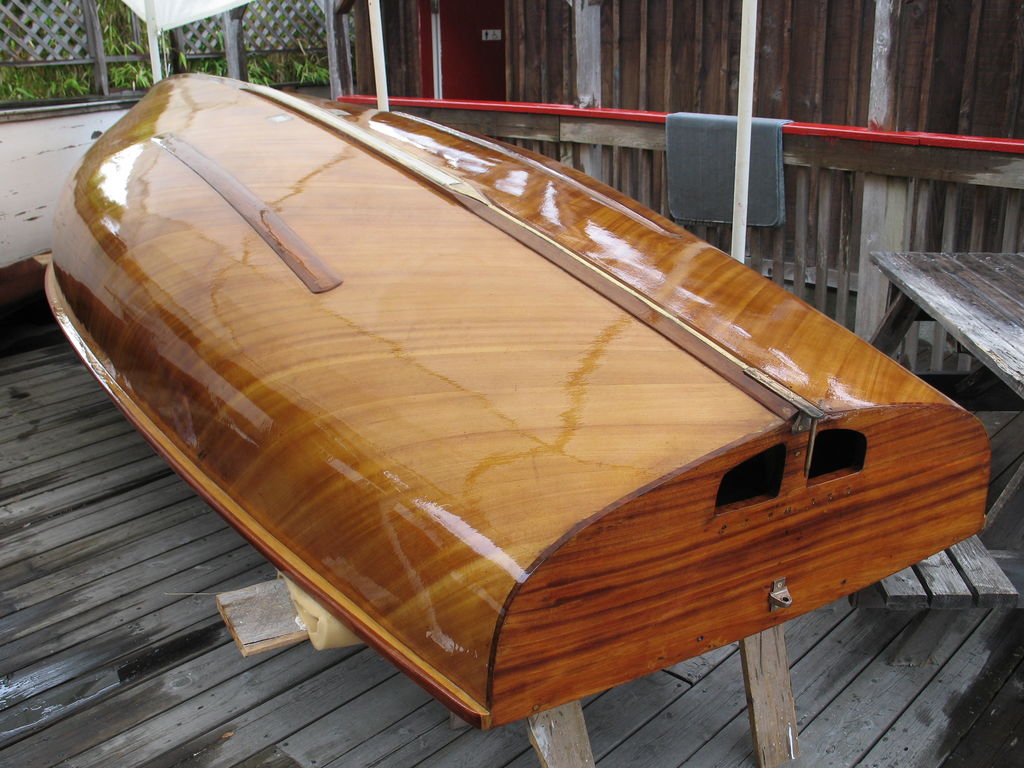
Looks good Marc. A bit of a "wiggle in bow, but you should be able to “eye-ball” that one. Remember - if covering with tape, foam doesn’t need to be super-smooth. The tape covers little imperfections. Also, remember to overlap tape of glass will stick to foam !
yeah the first two stations just don’t look right. the albacore has a wee bit of flair and for lack of a better terms some minor hollows in that small section.
it is pretty unique in that is goes wide pretty early…
I think I know what I did though…My first paper station was 1, the next one was 3, and so one…so in theory, from station 1 to Station 3 is 2 inches. so from station 1 to station 0 is 1/2 the distance, or 1 inch this whole time I’ve been trying to make it look right with double the distance. DOH…I’ll do some work on it later…I think I’ll work itself out. Pluss I have to keep in mind that I need to cut the first station back even further to allow space for the bumper…
So back to the tape. if I tape the hull the way claudio pictured. it should be easy enough to lay up the glass. and get it smooth. I though about the “latex” method to get a super smooth outer finish…but since I didnot use a building board that method may not be available.
will I need to put some sort of wax or release agent on the tape, or will the hull “pop” out of the taped mold easily.
Ialso though about using some joint compound to fill in small imperfections…but you are correct the tape will “hide those”
another think I though of. the albace has a pretty defined “keel” the runs the length of the boat., plus it also has some two strakes amidship. so i was wondering. do I incorporate these features into the foam and then tape over them to get them incorporated into the glass? or do I just ignore?