Hi Flavio,
Beautiful designs. I’m with you on this one.
Racing for those who want, but as my friend Mark Steele says, I’m for windling.
You have my vote
regards
vnkiwi
Six weeks after Presto commercial release I am now starting to receive first feedbacks.
Book is currently being sold in more than fifteen countries , among the others :
Usa, United Kingdom, Germany, France, Denmark, Sweden , Norway, Russia, India, New Zealand, Australia, China Korea and Japan.
But real surprise has been the unexpected number of kitboxes already sold : sixty .
( My estimate was around fifty items / year )
I am currently in touch with four of these Presto’s sistership builders.
Mr Cesare Costa, from Milan, contacted me to register his ITA 49 as “Miranda”, reporting me that he enjoyed the building process even if this has been his first approach to model building.
I hope Cesare will send me pictures of his creature.
Meantime, Mr Federico Hansberg sent me first shots of his Presto named " Captain Lautherbach ".
So far he has started - from zero - showing me the box opening ritual .
I hope in the next future Federico - himself - will share with us his building sequence.
Flavio
During past two years , I have posted pictures of Presto’s building sequence somewhere on this forum, but - frankly speaking - I don’t rember where.
Due to the fact that I have been requested to give more details about building sequence I will post here, once again, a small gallery of the process :
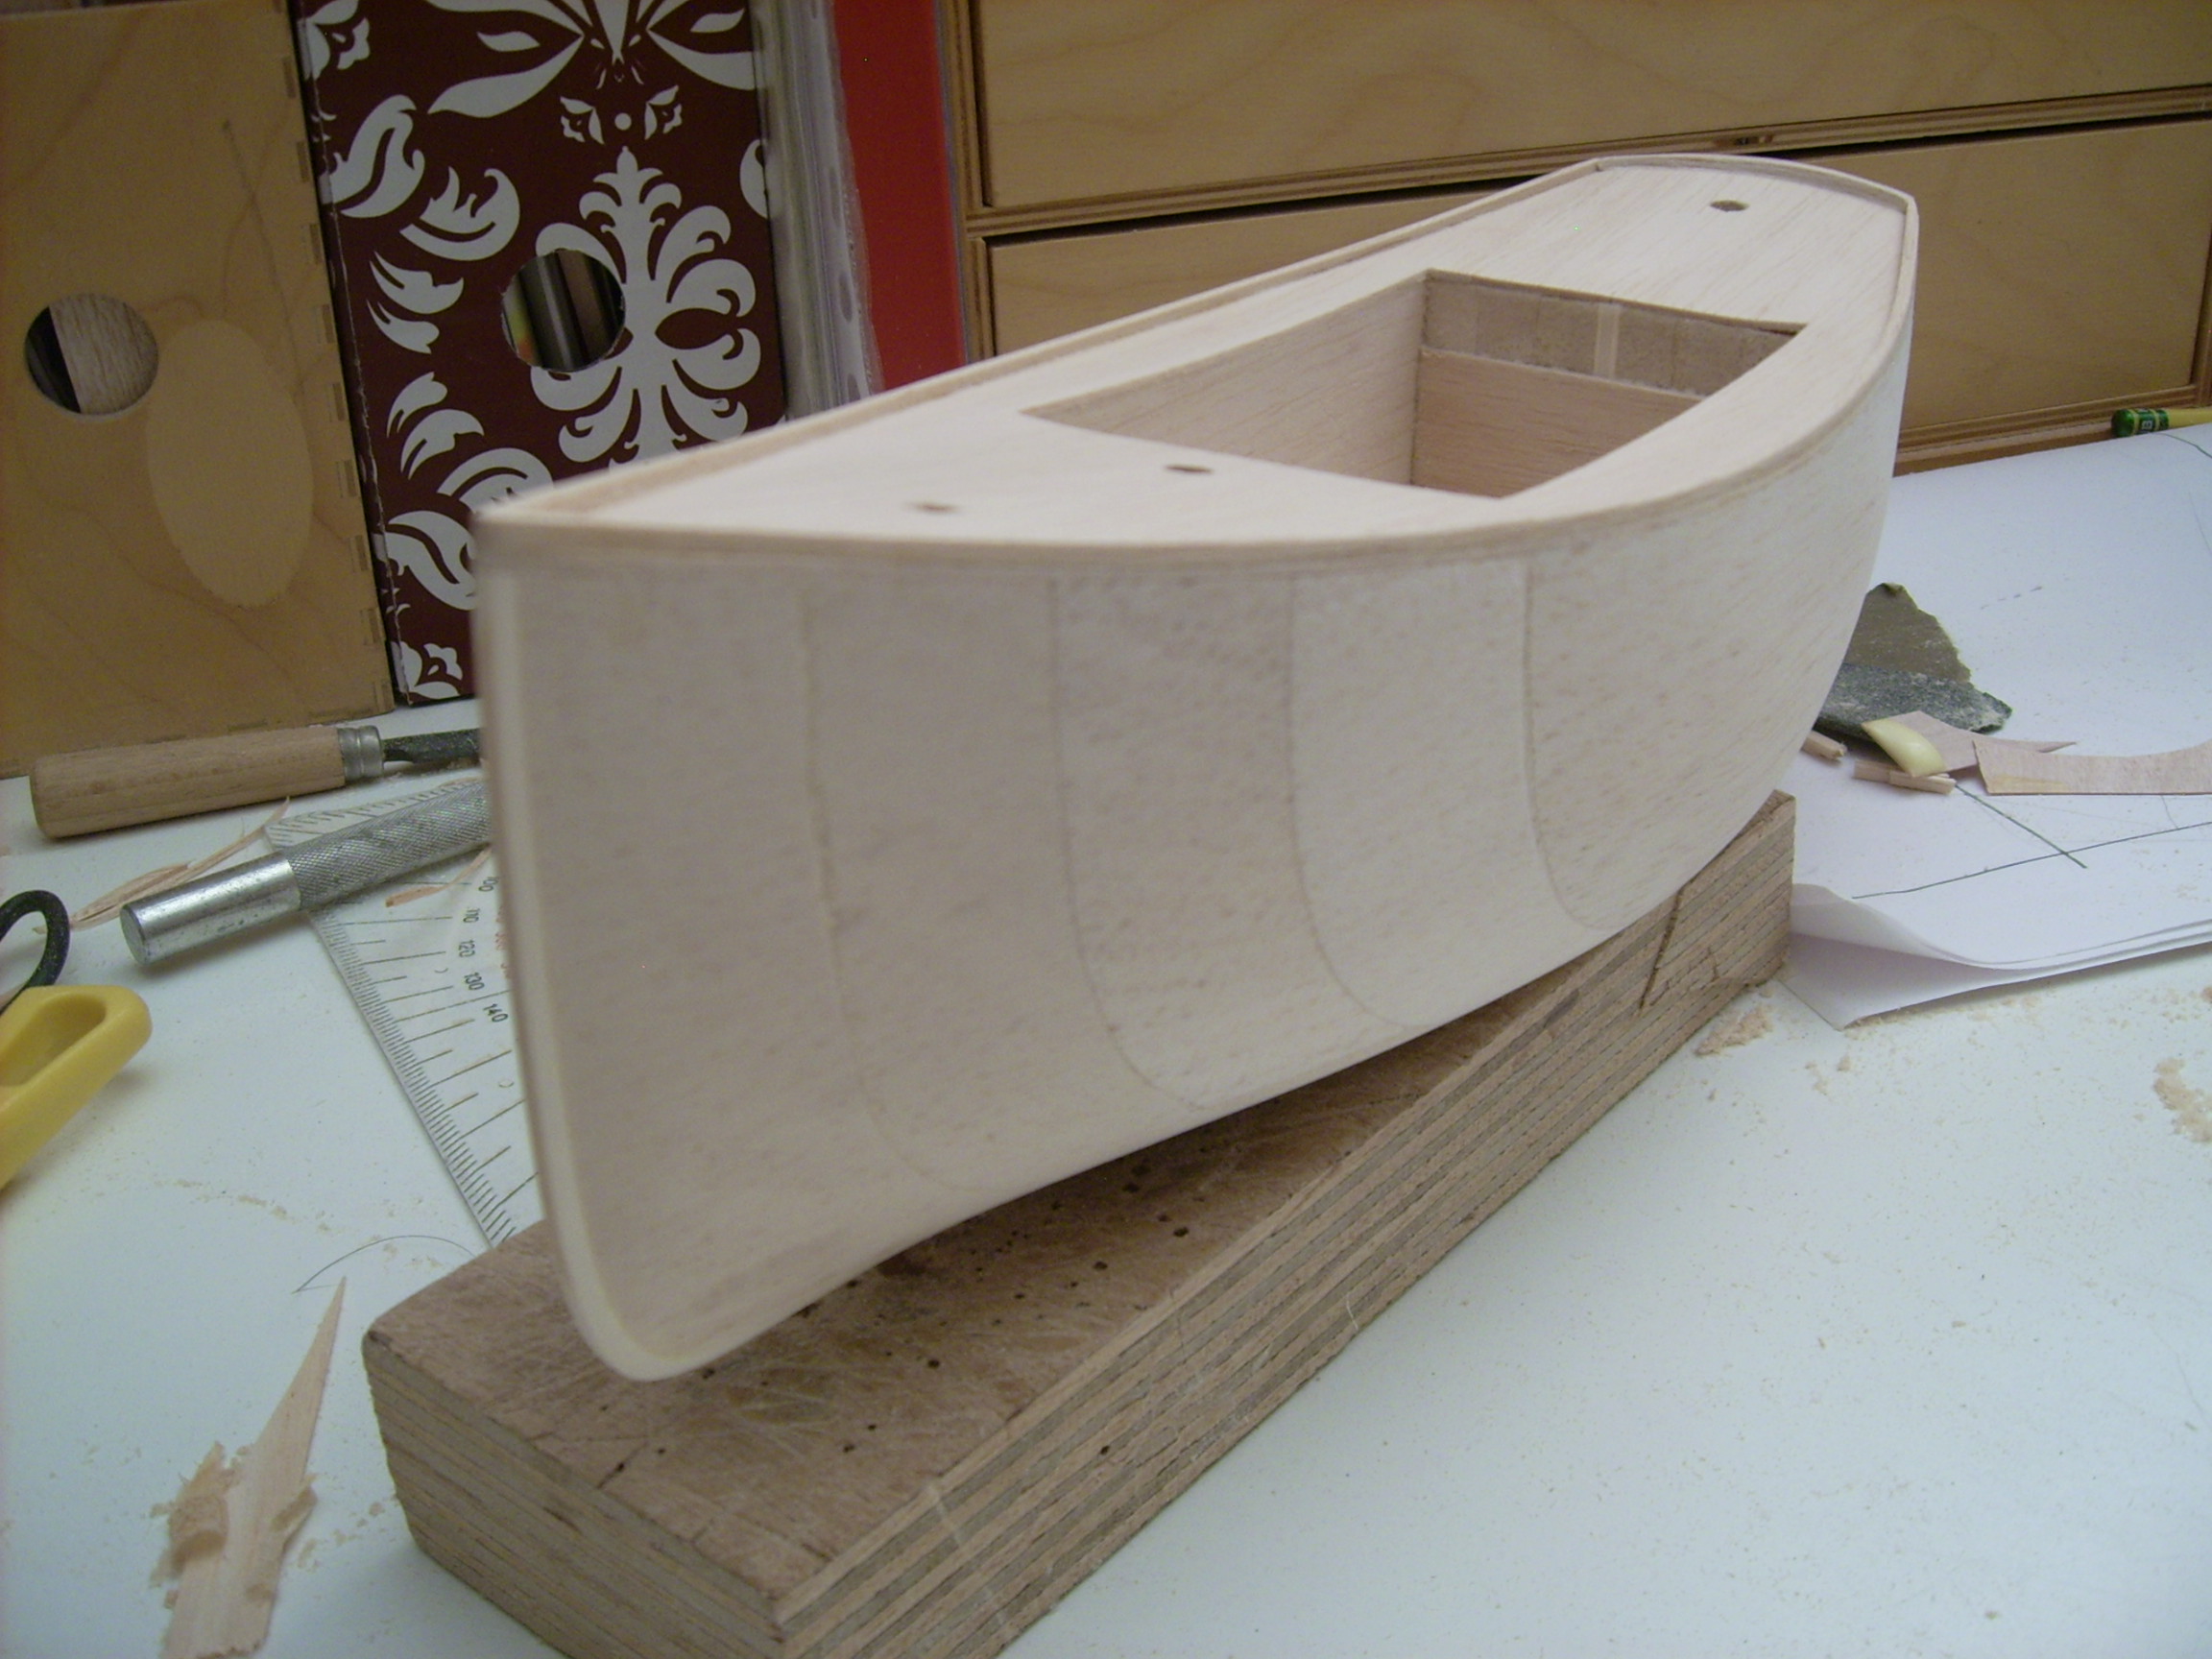
PART 1
hull block
hull carving
stern
hull
blades
deck
deckhouse
spars
more about final sequence next time
Flavio
After a long pause ( unfortunately sometime I am bit too busy doing something else )… this the second part of the building sequence of this model :
MkII Hull block ( with cockpit opening)
Birch ply transom
Unvarnished deckhouse
After six coat of varnish
[FONT=Book Antiqua]Builder’s plate
First coat of white paint
Rig and outfitting on next post…
… stay tuned
Flavio[/FONT]
I am happy to show here, for the very fist time a nice video of my Presto sailing between races during the Footy Gold Cup.
Due to the fact that my new battlehorse “Vulcan” was never tested before the championship on second day I moved to my much more reliable old Presto.
In this case I have used for the first time a new keel, and a paneled set of sails.
During day two, even if my transmitter was not working perfectly, this now old and quite heavy model has been able to compete against lighter and faster footies.
My good friend Andrew joined me with his sail number 22 “British Presto” following a structural failure of our “Folletto”.
It is interesting to note that almos all new/experimental/radical projects after first morning have been rejected by their skippers in favour of other more tuned spare models
Enjoy the movie
Flavio
http://www.youtube.com/watch?v=mfRDaw7ZccY&feature=BFa&list=LLI8aT6mZCbV3Gavabke8uPA
Nice video
I have been known to race occasionally, but mostly I sail alone.
To me it’s about relaxing. Racing is fun, but it doesn’t lower my blood pressure! 
I own a Nirvana 32", and a Fairwind III, (hardly a fast boat but very pretty).
Both are one class boats a far as racing goes.
I like the scale look though, and without Flavio’s designs I wouldn’t have bothered with a footy.
I have seen them sail, and bob, etc. and while cute, don’t sail like my bigger boats.
But Flavio’s designs won me over and I now have both the Brando and the Presto plans (and book).
I am presently building the Brando because I love catboats.
Here is my chance to build up my fleet with out re-mortgaging my house. Perfect!
I expect to have both designs built by spring. (The water gets hard here soon.)
So well done Flavio! Keep those little balsa designs coming. 
BTW, I/we could use a little more detail/pictures about the brass rudder attachments and those beautiful little louvered doors on the companionway. (Brando).
How do you make those?
Rick
Dear Rick,
many thanks for your comments about my little wooden models.
I hope you will enjoy building and sailing them.
I am lookink forward to see here pictures of your building logs.
Your feedback about time needed would be also very appreciated ( in my opinon around 40-50 manhours are needed for Brando and 70-80 for Presto )
About louvered doors :
it seems that this small detail is able to raise a lot of attention.
Unfortunately the designer ( me  ) omitted to give details about the matter on existing plans
During next days I will do my best to build a door for my own Presto deckhouse ( so far flat and ugly ) in order to have material for a “door tutorial”
Flavio
Thanks Flavio,
I’ll be watching.
Footy has been on hold for a few days, because I am tweaking my new Fairwind III by Kyosho.
http://www.rcgroups.com/forums/showthread.php?t=1781219#post23424222
Sadly, I never even thought about keeping track of the time I have spent on Brando, but I have been taking lots of pictures.
I’ll post them shortly.
Rick
OK, here they are.
I couldn’t find any way of adding captions to the pictures, so I’ll do a little explaining here.
I substituted 1/64 ply for the side since the pond where I usually sail is rife with youngsters and pointy speedboats.:irked:
I couldn’t be sure to drill a perfectly centered hole for the mast block, so I made one from two pieces of wood, scribed down the middle and grooved with a needle file before glueing together, then used increasingly larger drill bits to work it up to 1/4". Stayed centered that way.
Before I glued the deck on, I traced the areas that need to be cut open on some tracing paper along with an outline of the hull, so that after the deck was trimmed I could put the tracing on top of it, and I would know where to cut into it.
Even so, I cut the holes a bit undersized at first to be safe.
The planking was my own touch, done with a fine tipped black ball point pen. I may give the deck a grayish wash before I put any more spar varnish on it, to resemble aged teak.
I was going to curve the planks and do a king-plank, but for one thing, I thought it was too much for a simple catboat, and besides, the balsa grain would not have let me do a neat job of that. 
I have been acquiring little bits and pieces to finish off the little boat with some style.
I hope I can do justice to Flavio’s beautiful little boat.
It will be all wood, with a touch of brass here and there.
Finally got my Fairwind seaworthy and now I can work on my Brando again.
Here are some more pictures.
Have added the rub rail, and toe rail, glued some strips under the edge of the cabin hatch for reinforcement, and built and added the cockpit.
Long way to go, but it’s starting to look like a boat.
What’s the matter with this forum?
The pictures are always displayed in reverse order from posting order.
Nice job indeed !
ClaudioD
I solved the louvered door problem.
I built the door(s) from 1/64" ply and 1/64" cherry veneer.
I first cut and formed the 1/64 ply to the right size and shape, then I added the cherry side stiles, and cut and glued in the louvers.
I added the top stiles, (not mitered to 45 degrees), then I built a second set of stiles on top of the first ones, but this time I did miter the corners.
Thinned some spar varnish about with 50% thinner and to seal it all.
In these pictures I haven’t shown the doors sanded to the roof contour.
That has been done now.
Second from last picture is the beginning of the laminations for the tiller, also cherry veneer.
Rick that is fantastic work, love the deck … well done !
Cheers Alan
Some more work done.
These pictures are in no particular order.
Can’t seem to get them in the order that I want them in, so you’ll have to figure out the sequence yourself.
Basically what is covered is putting a bolt in the keel to ensure that it stays put.
Also pictures of the servos used for the sail and rudder.
Some details of the rudder pintle/gudgeon assembly in brass.
I’ve decided to put the batteries as low as possible in the hull, so I purchased some light plastic boxes that I can seal up with 2 AAA 900 mah rechargeable batteries (in battery holders) in each box wired together to give 4.8 volts.
Adds a bit of weight, but it’s still a very light boat.
I may even use AA batteries for longer periods of sailing. (2400 mah)
I will be putting in a switch with a built in charging lead, so I won’t have to open the battery boxes at all during the season.
I will spray all metal parts with Corrosion X before sealing up the boxes. Also all my radio plugs etc.
Very nice work Lilleyen
I’m intrigued by the eyelet forming pliers you’re using. They seem a much better idea than the pair of round nosed pliers I would be trying to use. Are your pliers a standard product and if so where can you get them?
Thanks
Phil
Thanks Phil,
Sorry about the picture sequence thing.
I’m used to posting on the RC Groups forums where the picture handling area is much simpler to navigate.
on there. I usually put captions on each picture, to sort explain what you are looking at, since it’s not always obvious.
In fact, I started a build thread there on this same footy, much easier to access.
(Haven’t update it yet.) http://www.rcgroups.com/forums/showthread.php?t=1793449
I mainly post on this thread because Flavio started it and it’s about the Presto and Brando, and I like to support Flavio’s efforts and encourage him, so he’ll keep on designing these wonderful little semi-scale sailboats.
To answer your question, the wire forming pliers were purchased at Micheal’s Craft Store here in Burlington Ontario Canada.
They were in the jewellery making section, if that helps.
I was actually trying to purchase some plain round nose wire forming pliers but they didn’t have any that day in the size that I wanted, so I took the last pair of these that they had.
Turned out to be a wise purchase, I like them, now that I’m used to them.
Rick